Most phone cameras stop focusing because of a lens obstruction, a software conflict, or a failing autofocus mechanism. Start here: wipe the lens with a microfiber cloth, remove your case, tap the subject on screen to force focus, and close the camera app completely. Those four steps resolve the majority of cases in under 90 seconds.
Two quick signals tell you which direction to go next. If you hear grinding or rattling when the camera tries to focus, or if the blur persists across every camera app and every lens, that points to hardware. If focus works normally after booting into Safe Mode or switching to a different camera app, a third-party app or software conflict is the culprit. Samsung support documents both patterns and recommends Safe Mode testing as a first diagnostic step.
- Clean the lens with a dry microfiber cloth (no liquids).
- Remove your case and any clip-on lens attachment.
- Tap to focus directly on your subject.
- Force-close the camera app and reopen it.
- Restart the phone if tapping to focus still fails.
Pro Tip: Before anything else, open your camera and slowly move the phone toward and away from a subject. If focus snaps in at one distance but not another, you may simply be shooting inside the minimum focusing distance — a physics limit, not a broken camera.
If those steps don’t work, the sections below walk through every cause and fix in order of likelihood.
Key Takeaways
Most phone camera focus problems are caused by a dirty lens, a software conflict, or hardware damage — and the majority resolve with a lens wipe, a tap-to-focus reset, or a Safe Mode test before any repair is needed.
| Point | Details |
|---|---|
| under 90-second triage | Wipe the lens, remove the case, tap to focus, and force-close the camera app first. |
| 10–15 minute checks | Test Safe Mode, clear camera cache, disable Tracking AF, and try an alternate camera app. |
| Hardware red flags | Grinding sounds, persistent blur across all apps and lenses, or visible lens damage mean repair. |
| Repair scope | Fixes range from lens cleaning to module replacement; same-day service is available for most models. |
| Repair Genius | On-site camera repair in Orlando and Winter Park with same-day availability and transparent pricing. |
Table of Contents
- What causes phone cameras to lose focus
- How to fix camera focus: a prioritized troubleshooting flow
- Which camera settings and modes affect focus
- How environment and physical damage create focus problems
- Clear signs it’s time to book a professional repair
- What repair shops actually do when they fix a camera that won’t focus
- What repair technicians actually see most often
- Camera focus repair, done at your door in Orlando and Winter Park
- Sources
What causes phone cameras to lose focus
Most autofocus failures trace back to three categories: something blocking or dirtying the lens, a software problem, or physical damage to the autofocus hardware. Here’s how each one shows up.
Obstruction and smudges
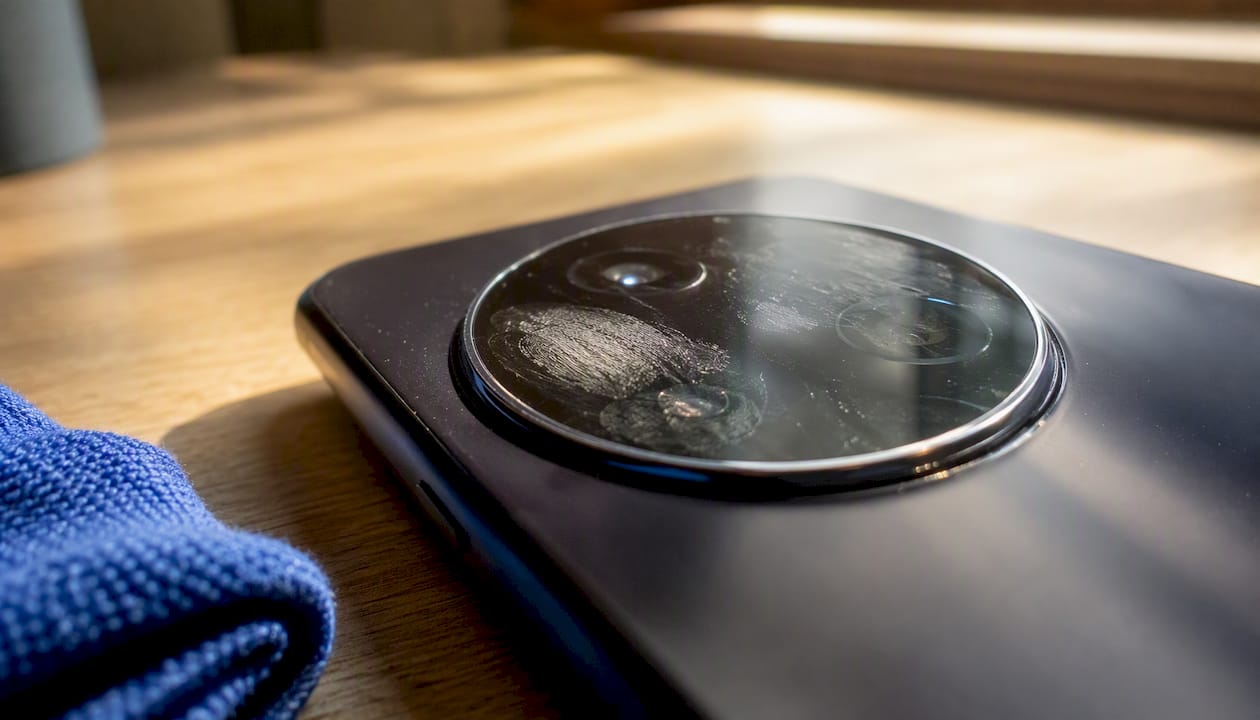
Fingerprints are the most common cause, and the easiest to miss. The lens sits flush with the back of the phone, so it picks up oils from your palm every time you set the phone down. Lint trapped under a case edge can press directly against the lens glass. Even a slightly misaligned case can partially cover the lens and create a soft, one-sided blur.
Software and app conflicts
Camera apps cache data over time, and that cache can corrupt focus behavior. Third-party apps that request camera access in the background sometimes interfere with the native autofocus stack. OS updates occasionally introduce bugs that affect scene-detection or stabilization features. Manufacturer guidance specifically calls out scene optimizer, stabilization, and tracking focus as features that can create unexpected behavior when they conflict with manual controls.
Hardware damage or wear
A dropped phone can misalign the lens assembly or damage the autofocus actuator without leaving a visible crack. The actuator is a small electromagnetic coil that physically moves the lens element; a hard impact can bend or break it. Repeated minor drops accumulate wear over months. Samsung support notes that grinding or rattling during an autofocus attempt is a reliable indicator of mechanical failure.
Optical and physics limits
Every phone camera has a minimum focusing distance, typically somewhere between 2 and 5 inches depending on the lens. Get closer than that and the camera physically cannot form a sharp image, regardless of software. Sony’s support documentation lists shooting inside the minimum focus distance as a common cause of “blurry camera” reports. Separately, Canon’s autofocus guidance explains that low-contrast subjects, repetitive patterns (a blank wall, fabric texture), and scenes where near and far objects share the AF point all cause the system to hunt or fail to lock.
Environmental factors
Bringing a cold phone into a warm, humid room causes condensation to form inside the lens assembly. The result looks like a permanently fogged lens until the moisture clears. Temperature shock can also temporarily seize the autofocus mechanism. These cases usually resolve on their own once the phone reaches room temperature, but they can be alarming if you don’t know what caused them.
How to fix camera focus: a prioritized troubleshooting flow
Work through these in order. Each step takes less than two minutes. Stop when focus is restored.
- Wipe the lens. Use a dry microfiber cloth. Breathe on the lens first to loosen oils, then wipe in a circular motion. Never use a paper towel or your shirt — both scratch the coating.
- Remove the case and any clip-on lens. Hold the phone bare and test focus again. A case that sits even 1mm too high can press against the lens ring.
- Check for visible damage. Look at the lens cover glass under a light. A hairline crack or chip scatters light and creates permanent blur that no software fix will touch.
- Tap to focus. Open the native camera app and tap directly on the subject. On most phones, a single tap sets both focus and exposure. If the camera locks on the wrong object, tap again.
- Try a different camera mode. Switch from Portrait or Night mode to standard Photo. Some computational modes apply aggressive post-processing that can look like a focus failure.
- Force-close the camera app and reopen it. On Android, swipe it out of recents. On iPhone, swipe up from the app switcher. This clears any in-memory state causing the camera to behave erratically.
- Restart the phone. A full reboot clears the camera daemon and any background processes interfering with it.
- Check for OS and camera app updates. A known autofocus bug in a previous OS version may already have a patch waiting.
- Clear the camera app cache. On Android: Settings → Apps → Camera → Storage → Clear Cache. This does not delete photos. iPhone users can offload and reinstall the camera app if a third-party app is involved.
- Boot into Safe Mode. On most Android phones, hold the power button, then long-press “Power off” until the Safe Mode prompt appears. If focus works in Safe Mode, a third-party app is causing the conflict. Uninstall recently added apps one at a time until focus returns to normal.
- Try an alternate camera app. Install Google Camera (Gcam) or another reputable camera app and test focus. If it works there but not in the native app, the problem is software-side and likely fixable without repair.
- Reset camera settings to defaults. Most native camera apps have a “Reset settings” option in the settings menu. This clears any manual focus, custom scene, or tracking AF settings that may have been toggled accidentally.
- Test all lenses and the front camera. Switch between wide, main, and telephoto lenses. If one lens focuses and another doesn’t, the problem is isolated to a specific module — useful information for a technician.
Pro Tip: Record a short 10–15 second video showing the focus failure before you visit a repair shop. Capture which lens, what distance, and what mode you’re using. Technicians diagnose faster when they can see the behavior rather than recreate it from a description.
Which camera settings and modes affect focus
Several built-in settings can make a perfectly functional camera appear broken. Knowing what each one does saves you from a repair visit you don’t need.
Tracking AF
Tracking autofocus locks onto a selected subject and follows it as it moves. The catch: Samsung documents that Tracking AF holds focus on one subject for approximately 3 seconds. During that window, tapping a new subject does nothing. To most users, this looks exactly like a frozen or broken camera. Disabling Tracking AF in the camera settings immediately restores normal tap-to-focus behavior.
AF lock and tap-to-focus
A long press on the screen sets an AF/AE lock on most Android phones and iPhones. The lock stays active until you tap elsewhere or close the app. If you accidentally set a lock on a background object, every shot will be blurry until you release it. On iPhone, the yellow “AE/AF Lock” banner at the top of the screen tells you when this is active.
Manual focus and Pro mode
Switching to Pro or Expert mode on Android gives you a manual focus slider. If you adjusted it and then switched back to Auto mode without resetting the slider, some phones carry the manual focus value into the standard camera. SLR Lounge’s focusing guide specifically flags this as a common trap: always verify the focus mode is set back to AF after using manual controls.
Minimum focusing distance
Get closer than roughly 2–4 inches from a subject and the camera cannot form a sharp image. This is a physical constraint of the lens, not a software bug. Sony’s support page lists this as one of the most frequently misdiagnosed “blurry camera” issues. The fix is to back up and use digital zoom, or switch to a dedicated macro mode if your phone has one.
Scene optimizer and stabilization
Features like Samsung’s Scene Optimizer analyze the frame and apply processing in real time. In some scenes, this processing conflicts with manual focus adjustments or creates a soft, over-processed look that reads as blur. Turning off Scene Optimizer in camera settings is a quick test.
Pro Tip: On iPhone, tap and hold on your subject until the AE/AF Lock banner appears. This locks focus at that distance even if the subject moves slightly, which is useful for portraits and product shots where you want precise control.
How environment and physical damage create focus problems
Condensation and temperature shock
Moving from a cold car into a warm restaurant, or from air conditioning into Florida summer heat, creates a temperature differential that pulls moisture into the lens assembly. The result is a foggy, soft image that clears as the phone warms up. SamMobile’s troubleshooting guide recommends powering the phone down and keeping it in a dry, ventilated area for about an hour. Do not use a hair dryer or place the phone in direct sunlight — rapid heating can damage the lens coating and battery.
Impact damage and microdamage
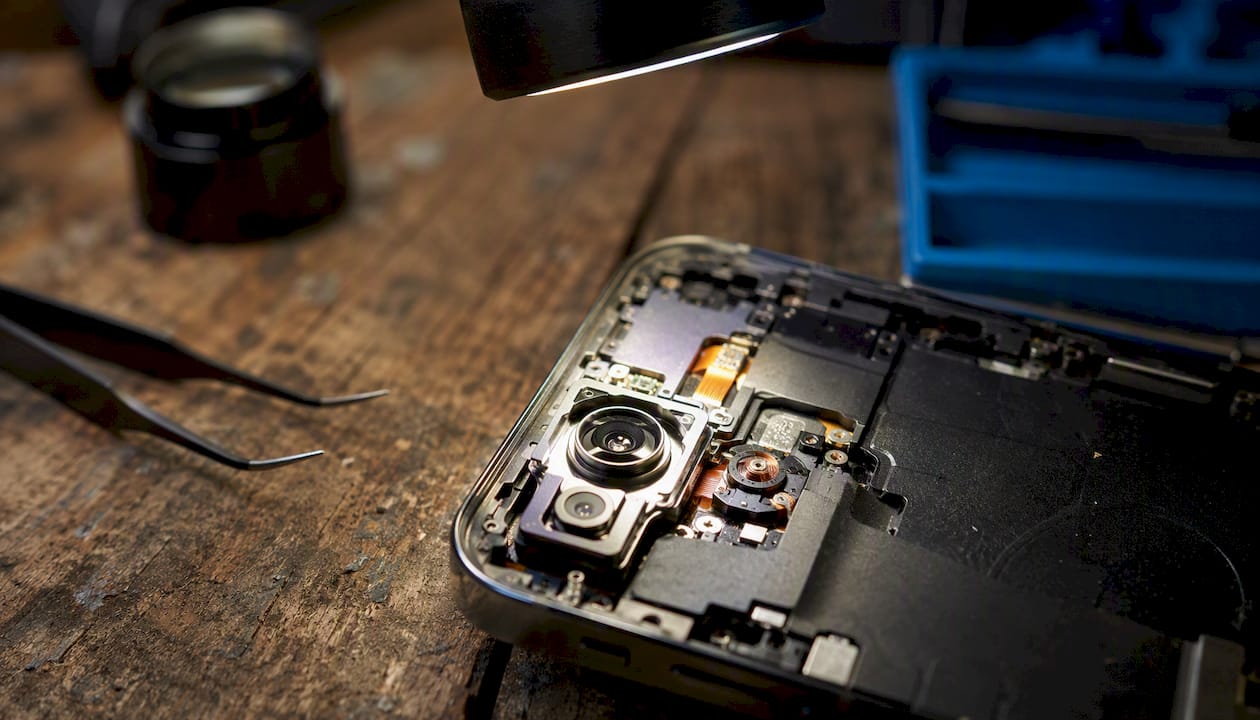
A drop doesn’t have to crack the screen to damage the camera. The autofocus actuator sits on a small suspension system inside the module; a hard impact can knock the lens element out of alignment or bend the actuator coil. Signs of impact damage include a persistent tilt or soft edge in every photo, a grinding sound when the camera tries to focus, and blur that affects only one lens but not others. These don’t resolve with software fixes.
Water and moisture exposure
If the phone got wet, power it off immediately and do not charge it. Dry the exterior with a cloth, then leave it in a dry environment. Do not attempt to open the device to dry it yourself. Attempting DIY disassembly voids most manufacturer warranties and risks causing additional damage to the flex cables and connectors near the camera module. A professional water-damage assessment is the safer path.
Low-light and low-contrast scenes
Modern phones use a combination of Phase Detection AF (PDAF) and contrast detection. PDAF works by comparing two slightly offset images from split pixels on the sensor; in very low light, there isn’t enough signal for PDAF to lock, so the camera falls back to contrast detection, which is slower and more prone to hunting. Canon’s autofocus documentation explains that repetitive patterns and scenes with subjects at multiple distances compound this problem. Quick workarounds: add a light source, use the phone’s focus-assist beam if available, or tap to focus on a higher-contrast edge near your subject.
Avoid opening the device yourself to inspect or clean internal components. Beyond the warranty risk, the ribbon cables connecting the camera module are fragile and easy to tear.
Clear signs it’s time to book a professional repair
Some focus problems are beyond what any setting change or app reinstall will fix. These are the signals that mean it’s time to stop troubleshooting and call a technician.
- Audible grinding or rattling when the camera attempts to focus. Samsung support identifies this as a strong indicator of physical damage to the autofocus motor or lens assembly.
- Persistent blur across every camera app and every lens, including after Safe Mode testing and a factory reset of camera settings.
- Visible misalignment of the lens cover, a cracked lens glass, or a lens that appears to sit at an angle.
- Focus failure that Safe Mode does not fix. If the camera still can’t focus in Safe Mode, the problem is hardware, not software.
- Water exposure with ongoing blur, even after the phone has dried out completely.
What a professional diagnostic looks like
A technician will run a visual inspection of the lens assembly and cover glass, test focus across all lenses and at multiple distances, listen for actuator sounds, and capture test images under controlled conditions. From there, the common repairs are external lens cleaning, re-seating a misaligned lens element, replacing the camera module, or replacing the protective lens cover glass. Recalibration via software may follow a module replacement.
Repair timelines for camera module work typically run same-day to three days depending on parts availability. Exact costs vary by device model and the specific repair needed; a technician needs to inspect the phone before quoting accurately. If the repair cost approaches the device’s current market value, it’s worth comparing against trade-in options. BuyBackBear’s trade-in value tool gives a quick estimate for Samsung devices before you commit to a repair.
Pro Tip: Before your appointment, shoot a 15-second video showing the focus behavior: which lens, what distance, what mode, and whether the problem is consistent or intermittent. A technician who can watch the failure diagnoses it significantly faster than one working from a verbal description.
| Point | Details |
|---|---|
| Hardware red flag | Grinding or rattling during autofocus attempts signals mechanical failure requiring repair. |
| Software triage | Focus restored in Safe Mode means a third-party app is the cause — uninstall recent apps. |
| Repair scope | Repairs range from lens cleaning to full module replacement depending on the damage. |
| Repair timeline | Camera module repairs typically run same-day to three days based on parts availability. |
What repair shops actually do when they fix a camera that won’t focus
The diagnostic process is more methodical than most people expect.
Step-by-step diagnostics
- Visual inspection of the lens cover glass, lens ring alignment, and any signs of impact or water intrusion.
- Functional test across all lenses (wide, main, telephoto, front) and multiple camera modes to isolate which module is failing.
- Listening test during autofocus attempts to detect actuator grinding or abnormal motor sounds.
- Test images at multiple distances (close, mid-range, infinity) to map where focus breaks down.
- Software check to rule out OS-level conflicts before opening the device.
Common repairs
- External lens cleaning: compressed air and optical-grade solvent remove debris from the lens cover without disassembly.
- Lens element re-seating: if the lens assembly shifted from an impact, a technician can realign it without replacing the full module.
- Camera module replacement: when the actuator or sensor is damaged, the entire module is swapped. This is the most common hardware repair for persistent focus failure.
- Lens cover glass replacement: a cracked or chipped cover glass scatters light and creates blur; replacing just the glass is faster and cheaper than a full module swap.
- Software recalibration: some devices require a calibration step after module replacement to align the new sensor with the phone’s image processing pipeline.
When repair isn’t the right call
If the device has multiple unrelated hardware faults, or if the repair cost exceeds the phone’s current resale value, a technician should say so plainly. Understanding how repairs affect resale value helps you make that call with real numbers rather than guesswork.
Data safety during repair
Before any invasive work, back up your photos and contacts. A reputable shop will not access your data, but a backup protects you if something goes wrong during the repair. Ask the technician explicitly what they will and won’t access before handing over the device.
What repair technicians actually see most often
The most common camera focus call I see at Repair Genius isn’t a broken autofocus motor. It’s a smudged lens or a case that’s sitting 1mm too high and pressing against the lens ring. Customers come in convinced the camera is broken, and a microfiber wipe fixes it in 30 seconds. That’s not a complaint — it means the fix was easy. But it does mean the first thing any technician will do is exactly what you should do at home first.
The second most common pattern is a software conflict after an OS update. A feature like Scene Optimizer or Tracking AF gets toggled on by the update, and the camera starts behaving in ways the owner doesn’t recognize. Disabling those features takes under a minute once you know where to look.
What surprises people is how often a “camera failure” after a drop turns out to be protective glass damage rather than a broken actuator. The lens cover cracks in a way that’s hard to see without a light, and the resulting scatter looks identical to a focus failure. A visual inspection under magnification catches this immediately and saves the cost of a full module replacement.
One pattern worth knowing: a thin, flexible case can warp slightly over time and begin pressing against the lens ring. The pressure doesn’t crack anything, but it prevents the lens element from moving freely. Removing the case resolves it instantly. If you’ve had the same case for over a year, it’s worth testing bare.
Camera focus repair, done at your door in Orlando and Winter Park
When the troubleshooting steps above don’t resolve the problem, the fastest path forward is a technician who comes to you. Repair Genius provides same-day on-site camera repair in Orlando and Winter Park, which means no drop-off, no waiting in line, and no leaving your phone at a counter overnight.

A typical appointment starts with a free diagnostic at your location, followed by a transparent quote before any work begins. Camera-related services include:
- Camera module diagnostics and replacement
- Lens cover glass replacement
- Water-damage inspection and cleaning
- Software conflict testing and camera recalibration
Before booking, have your device model, a note of your current OS version, and that short video of the focus behavior ready. It cuts diagnostic time significantly. Book your on-site repair or visit the Repair Genius homepage to check same-day availability.
Sources
The sources below are the primary manufacturer and technical references used throughout this guide.
- Galaxy phone or tablet camera does not focus on the subject
- How do I fix a phone camera that won’t focus? – SamMobile
- Why Won’t My Camera Focus? 15 Possible Reasons
- If your camera is blurry or not focusing — Sony support
- Autofocus may fail with low-contrast or low-light subjects — Canon support
Recommended
- At Home Phone Repair: DIY vs. Professional Options
- Face ID Repair: Quick Fixes and When to Get Help
- Phone Screen Not Responding? Same Day Repair Near You in Orlando