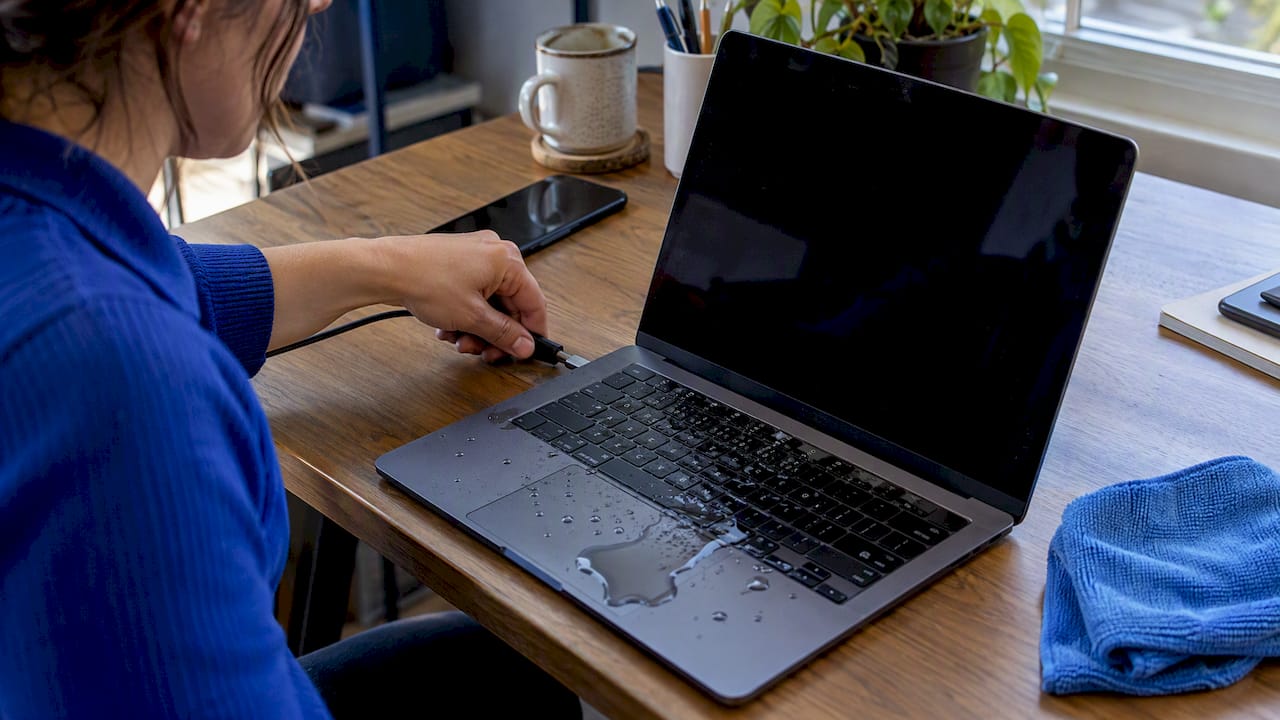
Hold down the power button until the laptop shuts off, then unplug the charger and pull out any USB drives or cables right away. Remove external accessories, blot visible liquid with a clean, lint-free cloth, and tilt the laptop keyboard-down so it can drain rather than pool inside. Don’t try to turn it back on. If the battery feels hot, looks swollen, or the laptop went fully underwater, stop and get professional help immediately rather than troubleshooting it yourself.
TL;DR:
- Leave the laptop off for at least 24 hours; larger spills, submersion, and liquids other than water may require 48 to 72 hours.
- Dry it in a ventilated room with a gentle fan, but avoid heat, rice, aggressive shaking, or repeated power attempts that can worsen damage.
- Saltwater, sugary or acidic drinks, submersion, or a hot or swollen battery warrant professional help; so do persistent or intermittent failures after drying.
- If the laptop boots after drying, back up files immediately, test its keyboard, ports, display, and battery, and arrange inspection for hidden corrosion.
Table of Contents
- What to do in the first five to ten minutes
- How to dry a laptop safely over the next few days
- Opening the laptop and cleaning internal parts yourself
- Mistakes that make water damage worse
- When a water-damaged laptop needs professional repair
- If your laptop powers back on after drying
- Preventing the next spill
- Why a professional inspection catches what you can’t see
- How Repair Genius can help with water damage
- FAQ
- Sources
What to do in the first five to ten minutes
Every second with power still connected raises the odds that liquid bridges two points on a circuit board and causes a short. The goal in this window is simple: cut power, soak up what you can see, and let gravity do the rest.
- Disconnect everything. Unplug the charger, remove any USB drives, external monitors, or docking stations, and take out anything plugged into a port.
- Force a shutdown if the laptop is still on. Holding the power button for several seconds usually forces most laptops off, though the exact timing varies by model, according to iFixit’s liquid damage guide.
- Check your own safety first. If you’re standing in water, if the spill reached a wall outlet, or if anything feels electrically unsafe, step away and switch off power at the breaker instead of reaching for the laptop, a precaution echoed in OSHA’s lithium-ion battery safety guidance.
- Blot, don’t rub. Use a clean, lint-free cloth on the keyboard, vents, ports, trackpad, screen, and case. Rubbing can push liquid further into seams and gaps instead of lifting it off the surface, per iFixit.
- Set up drainage. Place absorbent towels underneath the laptop, then tilt it gently, keyboard-down or in an inverted tent shape, so trapped liquid can run out. Avoid shaking it hard or flipping it in a way that could send liquid deeper into the keys or connectors.
The sequence matters more than speed alone. Powering off before you start blotting reduces the chance that a wet keyboard shorts a live circuit while you’re mopping it up.
Pro Tip: Keep a microfiber cloth near your desk. In a real spill, time spent hunting for a towel is time the liquid spends working its way into the keyboard.
How to dry a laptop safely over the next few days
There’s no single, guaranteed drying time that applies to every spill. Wait periods depend on how much liquid got in, what it was, and whether it reached the motherboard or battery compartment.
At least 24 hours of drying is standard guidance, with larger spills, submersion, or non-water liquids often calling for 48 to 72 hours before any attempt to power the laptop on, according to iFixit. That range exists because a few drops on the trackpad dry faster than a full glass that soaked the keyboard and pooled under the battery.
While you wait, set up the right conditions:
- Find a well-ventilated room with normal airflow rather than a sealed closet or box.
- Keep the laptop inverted in an open tent position, propped above absorbent towels so moisture keeps draining instead of sitting against the case.
- Point a regular fan at it for gentle airflow. Manufacturer guidance, including Google’s safety manual for the Pixelbook Go, specifically warns against using an external heat source to speed things up.
- If you’re comfortable removing the battery or opening a removable panel, doing so can speed drying, but this only makes sense if you have a model-specific guide and the right tools, per iFixit.
Check in periodically rather than constantly. You’re looking for the absence of problems: no visible moisture on the screen edges or around the ports, no damp or musty smell when you bring your nose close to the vents, and the wait period appropriate to how bad the spill was. A splash of water that you caught quickly is a different situation than a mug that tipped over and sat before you noticed.
If you removed the battery or any panels, resist the urge to reassemble early just because the outside looks dry. Moisture trapped between layers, under a heat sink, or inside a connector housing can linger well past the point where the keyboard feels fine to the touch.
Opening the laptop and cleaning internal parts yourself
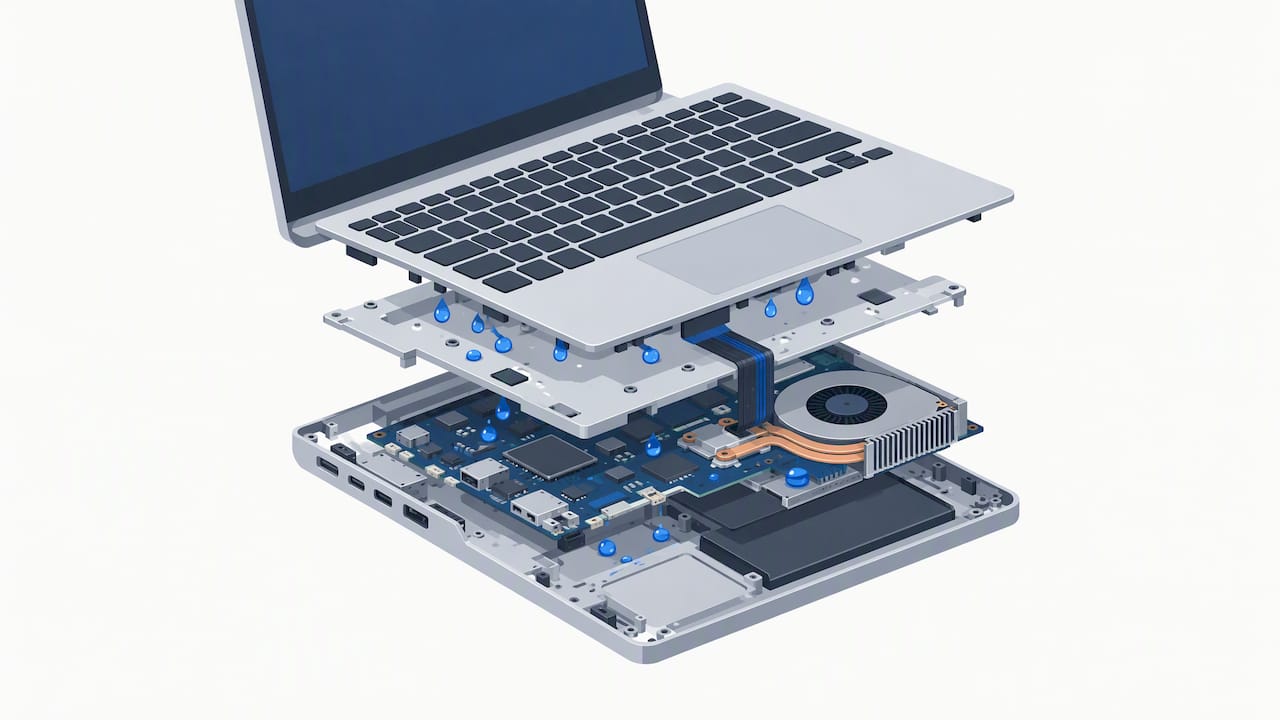
This step is optional, and it’s only a good idea if you already have the tools, a model-specific teardown guide, and a steady hand. Modern thin laptops pack components tightly, and inexperienced disassembly can snap a ribbon cable, crack a battery seal, or break a clip that’s nearly impossible to replace on its own, as iFixit notes. If any of that sounds like more risk than you want to take on, skip to professional repair instead of pushing forward.
For readers who do want to proceed:
- Gather the right supplies first. You’ll want isopropyl alcohol at 90% concentration or higher, a soft-bristle brush (an old toothbrush works), and lint-free wipes. Avoid acetone or other harsh solvents, which can damage plastics and coatings, per guidance echoed in both iFixit’s liquid damage guide and OSHA’s battery safety materials.
- Remove what’s safe to remove. If the battery disconnects easily and safely, take it out. Pull any removable storage drives so you can inspect and clean them separately.
- Clean visible residue carefully. Dab isopropyl alcohol onto the brush, not directly onto the board, and gently work it over any discoloration or sticky residue on the circuit board and connectors. For readers with access to one, an ultrasonic cleaner is a professional-grade option for boards with heavier contamination, according to OSHA and iFixit.
- Inspect every connector and ribbon cable. Look closely for a greenish or white crust, which signals corrosion. Clean what you can, let everything dry fully, and don’t reuse a connector that still shows corrosion after cleaning; replace it instead.
Reassemble only once every part you touched is completely dry and clear of residue. A board that looks clean but still carries a thin film of dried sugar or salt from the spill can start corroding again, so this is the point where rushing costs you the most.
Pro Tip: If you’re not sure whether a cable or connector shows corrosion versus normal wear, photograph it before cleaning. Comparing before-and-after photos makes it much easier to tell if you actually solved the problem.
For a sense of what’s at stake inside the case if cleaning isn’t thorough, our breakdown of laptop motherboard failure symptoms, causes, and fixes covers how corrosion and shorts can show up after the original damage.
Mistakes that make water damage worse
A few instincts feel helpful in the moment but tend to backfire.
- Rice and household desiccants don’t work the way people assume. Rice absorbs some ambient moisture but does nothing to remove the liquid, sugar, or salt already inside the laptop, and grains can work their way into ports, according to iFixit.
- Heat sources are a hard no. Ovens, radiators, heat guns, and hair dryers set to hot can warp plastic components, damage the battery, or melt adhesive inside the case. Google’s Pixelbook Go safety manual explicitly advises against external heat for this reason.
- Repeatedly trying to power it on is a gamble, not a test. Each attempt while moisture remains inside raises the risk of a short circuit, per iFixit’s guidance. If the first attempt doesn’t work, stop and let it dry longer rather than trying again a few minutes later.
- Shaking or flipping the laptop aggressively can push liquid from a surface spill into a connector or compartment it hadn’t reached yet.
The common thread: patience and gentle handling protect the laptop far better than any aggressive drying trick circulating online.
When a water-damaged laptop needs professional repair
Some situations call for a technician rather than a weekend project, and recognizing them early protects both your safety and your data.
- Battery warning signs mean stop immediately. Heat, swelling, smoke, a hissing or bubbling sound, or an unusual odor from the battery compartment are signs of a damaged lithium-ion cell, and OSHA’s safety guidance is clear that these batteries should not be handled, opened, or thrown in regular trash. Move away and get professional help.
- The type of liquid changes the stakes. Full submersion, saltwater, or sugary and acidic drinks like coffee or cola corrode circuits far faster than plain water, and usually call for professional board-level cleaning rather than a home attempt, per OSHA and iFixit.
- A laptop that stays dead after a proper dry-out, or one with keys, a display, or storage that work intermittently, likely has damage a technician needs to find with the case open, according to iFixit.
- When the files on the drive matter more than the hardware, contacting a professional with data-recovery experience is the safer move instead of repeatedly trying to force the laptop to boot.
Our guide on signs your laptop needs immediate repair walks through more of these warning signs if you’re trying to decide whether a specific symptom is serious.
Pro Tip: Write down exactly what happened (the liquid, how much, how long it sat, what you’ve tried) before you call anyone. That timeline helps a technician diagnose faster and skip steps you’ve already ruled out.
If your laptop powers back on after drying
A successful boot is a good sign, but it’s not a clean bill of health. Treat the next hour carefully.
- Back up your files immediately. Copy anything important to an external drive or cloud storage before doing anything else, and avoid heavy workloads like video editing or gaming that stress the hardware right after a spill, per iFixit.
- Test everything you can. Type across the full keyboard, check the trackpad, plug into each port, look at the display for discoloration or flicker, and watch the battery indicator for odd behavior. Small glitches now often point to damage that hasn’t fully shown itself yet.
- Book an inspection even if it seems fine. Corrosion can develop slowly on a board that looks clean, and a laptop that works today can fail weeks later from residue a technician would catch early, according to iFixit.
If you’d rather compare the cost of inspection against a potential replacement, our laptop repair before replacement checklist breaks down how to weigh that decision.
Preventing the next spill
A little setup now saves you this whole process later.
- Keep drinks on the opposite side of your desk from the keyboard, or use a spill-resistant stand that angles the laptop away from direct splashes.
- A silicone keyboard cover adds a cheap layer of protection against small splashes without affecting typing feel much.
- Charge from surge-protected outlets, which also helps protect the laptop from power spikes unrelated to liquid damage.
- When traveling, store the laptop in a padded, sealed sleeve or compartment separate from water bottles, and consider a rugged option; this guide to rugged, waterproof power banks covers gear built for exactly this kind of outdoor and travel protection.
- If the keyboard turns sticky or a handful of keys stop registering after a spill, professional cleaning or keyboard replacement is usually faster and more reliable than repeated at-home attempts, per iFixit.
Why a professional inspection catches what you can’t see
A laptop that boots up and seems normal can still carry corrosion forming quietly under a connector or along a trace on the board. That’s the gap a professional inspection closes: a technician can open the case fully, see the actual condition of each component, and clean or replace parts with the right solvents and tools instead of guessing from the outside.

On-site repair adds speed to that process. Bringing a technician to your location for diagnosis and data-safe handling means you’re not shipping a device with your personal files to an unknown facility or waiting days for a shop appointment.
Before approving any repair, it’s worth asking a few direct questions: what did the diagnostic find, what’s the warranty on parts and labor, and how is your data handled during the repair. A provider who answers clearly and specifically is a good sign; vague answers are not.
— Michael
How Repair Genius can help with water damage

We offer on-site computer and laptop repair that comes to you instead of asking you to ship a water-damaged machine somewhere and wait. That matters most in the hours right after a spill, when getting the laptop dried, inspected, and cleaned quickly can be the difference between a simple fix and a board that’s had time to corrode. Our technicians handle diagnostics and board-level cleaning on-site with transparent pricing and no hidden fees.
If you’re seeing battery warning signs, if the laptop stays dead after a proper dry-out, or if the files on it matter more than the hardware, that’s the point to stop troubleshooting and call us in.
- Stop using the device the moment you notice a problem, even if it still seems to work.
- Back up anything you can access safely before contacting us.
- Reach out to our on-site computer repair services for a diagnostic and a clear quote before any repair starts.
For MacBooks and iMacs specifically, our MacBook & iMac repair page covers the service details for Apple hardware affected by liquid exposure.
FAQ
Does water damage happen immediately?
Some damage, like a short circuit, can happen if the laptop stays powered on while wet. Other damage, like corrosion on a circuit board, develops gradually, which is why drying and inspection matter even if the laptop seems to work right after the spill.
How long does it take for a laptop to dry?
There’s no fixed time that works for every spill, but common guidance calls for at least 24 hours, and 48 to 72 hours for larger spills or full submersion, according to iFixit. Wait longer for sugary or acidic liquids, since residue left behind keeps causing damage even after the surface feels dry.
I spilled water on my laptop keyboard and some keys stopped working. What should I do?
Keep the laptop powered off and avoid spraying any cleaner directly into the keyboard. Failed keys often mean liquid or residue reached the keyboard matrix or a connector underneath, and a technician may need to disassemble the keyboard area to clean or replace affected parts, per iFixit.
Can a laptop survive a water spill?
Many laptops do survive, especially with a quick response: power off immediately, blot the liquid, drain it properly, and give it enough time to dry before testing it. Survival odds drop with submersion, sugary or acidic drinks, or any delay in cutting power, since those conditions speed up corrosion inside the case.
Sources
- Laptop is Liquid Damaged – iFixit
- Safety, Warranty & Regulatory Manual for Pixelbook Go – Help
- Lithium-ion Battery Safety
Recommended
- How to Fix a Water Damaged Phone
- Water Damage Repair in Orlando: Same-Day On-Site Service
- 6 Manufacturer Backed Checks When Your Laptop Won’t Boot
- Signs Your Laptop Needs Immediate Repair: 2026