You can often fix a malfunctioning laptop USB port with simple troubleshooting, since most sudden failures trace back to software, drivers, or power settings rather than broken hardware. Start there: update drivers, test different cables and ports, and rule out a bad accessory before assuming the worst. If the port is loose, visibly damaged, or only works intermittently when you wiggle the cable, stop plugging things into it and treat it as a hardware problem that needs a closer look, whether that means on-site diagnostics or bench-level repair.
TL;DR:
- If every USB port fails at once, reinstall host controllers, update chipset drivers, disable USB power saving, and test again while connected to AC power.
- Test a known working device, cable, and alternate computer; use a powered hub when a device may draw more current than one port supplies.
- Inspect the powered off laptop with a light, and clean debris only with short bursts of compressed air; avoid swabs and metal tools.
- A loose connector with intact solder may need reflow, while lifted pads, corrosion, or a damaged USB C power controller require specialist board repair.
- Before approving work, request an itemized quote that separates diagnostics, parts, and labor, confirms warranty coverage, and states whether the price is fixed or estimated.
Table of Contents
- Software and system checks to rule out before you touch any hardware
- Checking the port itself without opening up the laptop
- Opening the laptop: internal inspection for owners comfortable with teardown
- Connector swaps, reflow work, and board-level repairs explained
- What laptop USB port repair actually costs
- How to pick a repair option and what to ask before you book
- What on-site repair can realistically fix, and what Michael brings to it
- Why I’d rather see a loose port fixed early than ignored
- Getting your laptop’s USB port fixed without the runaround
- FAQ
- Sources
Software and system checks to rule out before you touch any hardware
Before you assume a port is dead, work through the checks that cost nothing and take fifteen minutes. A surprising number of “broken” ports are actually a driver conflict, a power management setting, or a Windows glitch that has nothing to do with the physical connector.
Start with Device Manager. Look under “Universal Serial Bus controllers” for anything with a yellow warning icon, a device labeled “Unknown USB Device,” or a controller that looks disabled. Right-click each USB host controller and uninstall it, then restart the laptop so Windows reinstalls them fresh. This single step resolves a large share of cases where a port recognizes nothing at all.
Next, update your drivers properly. Go to your laptop maker’s support page and pull the latest chipset and USB drivers rather than relying only on whatever Windows Update installs automatically. If you’re on an Intel, AMD, or Nvidia platform, check their own driver pages too, since chipset drivers sometimes lag behind what the laptop manufacturer ships. Run Windows Update separately and install any pending cumulative updates, since Microsoft has shipped USB-specific fixes in routine patches before.
Power settings are the next stop. Open Device Manager, find your USB Root Hub entries, open Properties, go to the Power Management tab, and uncheck “Allow the computer to turn off this device to save power.” Do this for every USB Root Hub listed. While you’re there, plug the laptop into AC power and test the port again. Many laptops throttle or disable USB power delivery on battery to save energy, which looks exactly like a dead port but isn’t. If you’re comfortable in the BIOS or UEFI setup, check for a “USB legacy support” or “USB power in sleep” setting that might be disabled or misconfigured.
Finally, isolate the variable. Microsoft’s own troubleshooting guidance recommends testing with a different port, a different cable, and a different device before concluding anything is actually broken. Try these combinations:
- Plug a known-good device, like a mouse or flash drive, into the suspect port.
- Plug your original device into a different, working port on the same laptop.
- Try your original cable and device on a different computer entirely.
- If the device needs more power than a single port supplies, test it through a powered USB hub.
That last step matters more than people expect. Microsoft notes that some devices simply draw more current than a single bus-powered port can deliver, and a powered hub or direct wall power resolves what looks like a port failure.
One in two “dead port” complaints turns out to be a software issue rather than physical damage. Driver reinstalls, disabling USB selective suspend, and testing on AC power resolve roughly 40 to 60% of sudden port failures, according to diagnostic data compiled by Hetman Recovery. If every single port on your laptop stopped working at the exact same moment, that pattern points even more strongly toward a driver or power management issue, since it’s statistically unlikely for multiple independent ports to fail physically at once.
If you’ve worked through all of this and the port still won’t recognize anything, or only one specific port fails while the others work fine, you’re probably looking at a physical or mechanical issue instead.
Checking the port itself without opening up the laptop
Once software checks are exhausted, move to a visual and physical inspection you can do without a screwdriver. This step separates a port that just needs cleaning from one that needs an actual repair.

Power the laptop off and unplug it from the wall before you go near the port with anything. Grab a flashlight and look straight into the connector. You’re checking for lint, dust, pet hair, or a bent pin or tab inside the housing. USB-C ports have small contacts along both the top and bottom of the opening, so check both sides. On USB-A ports, look for the metal tongue being centered and straight rather than bent to one side or pushed back into the housing.
A short burst of canned air is the safest cleaning method. Hold the laptop at an angle so debris falls out rather than deeper into the port, and use short bursts rather than one long continuous blast, which can push dust further in or introduce condensation from the compressed gas. Avoid cotton swabs, toothpicks, or anything metal inside the port. A metal probe can bend a contact pin or short two pins together, turning a cosmetic problem into an electrical one.
- Inspect the port under a bright light for bent pins, debris, or a tongue that sits off-center.
- Clean only with short bursts of compressed air, never a swab or metal tool inside the housing.
- Test with a cable and device you know work on another machine, to rule out a bad accessory.
- Try a powered USB hub between your device and the laptop to see if power delivery is the issue rather than data.
- Watch and listen for the “device connected” sound or notification even if the screen shows nothing, since that tells you whether the port is detecting hardware at all.
If a cable that works fine elsewhere still fails in this specific port, and a different cable in the same port also fails, the port itself is the common factor. That’s a meaningful data point once you’ve already eliminated software causes.
Pro Tip: Before you book any repair, take a short video of the symptom, like the cable wiggling loose or the connection dropping, and a close-up photo of the port’s interior. A technician can often narrow down the likely cause before even seeing the laptop in person.
If cleaning and cable swaps don’t change anything and the port still won’t charge a device or transfer data, you’re dealing with either a mechanical fault inside the housing or a deeper electrical issue on the board. That’s the point where opening the laptop, or handing it to someone who will, becomes the next real step.
Opening the laptop: internal inspection for owners comfortable with teardown
This section is for readers who are mechanically confident and have access to their laptop’s service manual, not a casual weekend project. If you’re not comfortable with a screwdriver and an anti-static strap, skip ahead to the repair options below.
Before anything else, disconnect the charger, remove the battery if it’s removable, and if it’s internal, disconnect the battery connector from the motherboard once you’re inside. Ground yourself with an anti-static wrist strap or by touching a grounded metal object, since a static discharge can damage components that have nothing to do with the port you’re trying to fix. Follow your specific model’s service manual for screw locations and clip release order. Laptops vary enormously here, and forcing a panel that’s still held by a hidden screw is one of the most common ways a simple repair turns into an expensive one.
Once you have access to the port, here’s what to look for:
- Check the anchor points, the small metal tabs or brackets that hold the connector physically to the chassis, for cracks or looseness.
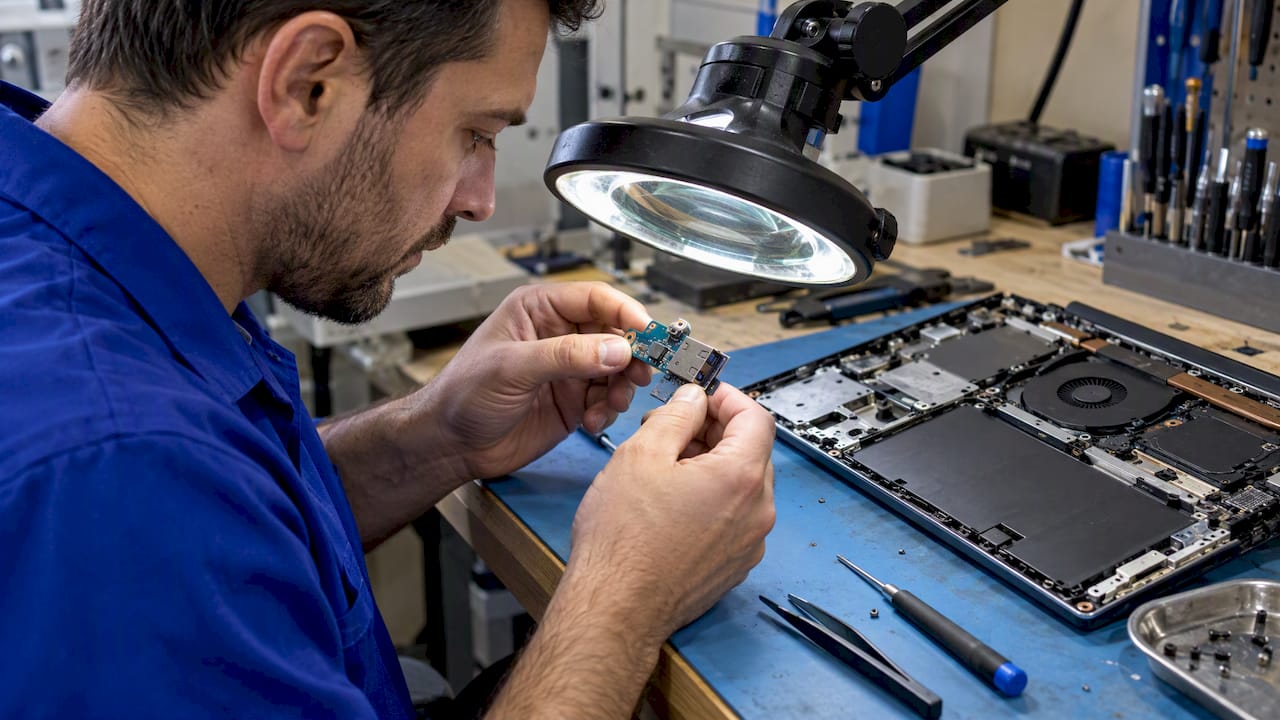
- Inspect the solder joints around the connector under bright light, or ideally under 10 to 20x magnification, looking for dull, cracked, or separated solder rather than smooth, shiny fillets.
- Look for corrosion, a greenish or white crust, especially if the laptop has ever been exposed to a spill, since corrosion spreads and worsens over time.
- Check that the port isn’t just mechanically loose on the board itself, which you can sometimes feel by gently pressing on it with the laptop powered off.
A multimeter set to continuity or resistance mode lets you go a step further. Inspection guidance from LaptopJudge recommends zeroing or compensating your meter leads first, since the resistance of the leads themselves can throw off a low-resistance reading, then checking continuity between the port’s pins and their corresponding points on the board. For USB-C specifically, checking the CC1 and CC2 pins matters, since those carry the configuration signaling that negotiates power and data roles. No continuity where there should be some usually means a lifted pad or a broken trace, which is a different repair than a simple loose connector.
Pro Tip: If you see lifted copper pads or a trace that’s visibly separated from the board, stop. That’s a micro-soldering job, not a weekend fix, and attempting it with basic tools usually makes the eventual professional repair more expensive.
Use this rough rubric: a connector that’s mechanically loose but has intact solder and pads is often reflowable by someone with proper equipment. A connector with corrosion, missing pads, or a damaged controller chip nearby needs board-level repair. If you’re not confident which situation you’re looking at, that uncertainty itself is a reason to get a professional diagnostic before buying parts or attempting a repair.
Connector swaps, reflow work, and board-level repairs explained
Not all USB port repairs are the same job, and the difference matters for both cost and outcome. Understanding which category your laptop falls into helps you evaluate any quote you receive.
Some laptops use a modular USB connector mounted on a small daughterboard that plugs into the motherboard, separate from the main board itself. Others solder the USB connector directly onto the motherboard with no intermediate board at all. The modular design is both easier and cheaper to fix, since a technician can often swap the whole small board rather than doing delicate work on the main motherboard. A connector soldered directly to the motherboard requires desoldering the damaged part and installing a replacement in its place, which takes more skill and more time.
- A loose but electrically sound connector may be fixable with a controlled solder reflow, which reheats existing solder joints to restore a clean connection.
- Reflow cannot fix a connector where the copper pads themselves have lifted off the board, since there’s no longer a solid anchor point for solder to bond to.
- Repeated reflow attempts on the same joint raise the risk of overheating nearby components or lifting pads that were previously fine, according to solder diagnostic guidance from LaptopJudge.
- Corrosion, a shorted VBUS line, or a failed USB Power Delivery controller chip typically forces a board-level repair rather than a simple connector swap, since the fault sits deeper in the circuit than the port itself.
On USB-C laptops specifically, the port connects to a PD controller chip that negotiates voltage and current with whatever you plug in. If that chip is damaged, even a perfectly reflowed connector won’t charge the laptop properly, because the negotiation itself fails. That’s one reason a USB-C port issue can be harder to diagnose than a traditional USB-A problem, and why reference material on USB Power Delivery negotiation explains the handshake process between a port and a charger or power bank in more detail if you want to understand what’s actually happening electrically.
After any repair, a competent technician verifies the fix rather than just handing the laptop back. That typically means testing actual charging with a known-good charger, confirming data transfer with a flash drive or external drive, and, for USB-C ports, testing alternate mode functionality like video output if that port is supposed to support it. Around 40 to 60% of USB issues that looked hardware-related at first actually resolve through software or driver fixes rather than physical repair, per Hetman Recovery’s diagnostic data, which is exactly why verification testing after any repair should include a basic driver and Device Manager check too, not just a visual confirmation that the port is physically solid again.
What laptop USB port repair actually costs
Repair pricing varies by what’s actually wrong, and knowing the price bands ahead of time helps you tell a fair quote from an inflated one. For a deeper breakdown of how pricing scales across different laptop repair categories, our guide to business laptop repair types covers the broader picture beyond just ports.
A straightforward connector swap, especially on a modular daughterboard design, is the cheapest category of fix. A motherboard-level repair involving desoldering a connector that’s soldered directly to the board, or any work that touches the PD controller chip or surrounding circuitry, costs more because it demands more time, more precision, and a higher skill level from the technician doing it.
- Expect a diagnostic fee as a starting point before any repair work begins, which most shops apply toward the final bill if you proceed.
- Labor is typically billed hourly, with board-level and micro-soldering work commanding a higher rate than a straightforward part swap.
- Parts cost depends heavily on whether the port is a generic USB connector or a specialized module that also handles charging and video, since multi-function ports cost more to source.
- Turnaround depends on parts availability. A common connector that’s in stock might be same-day, while a specialized board or a part that needs ordering can take longer.
Your laptop’s model and age change the equation too. Thinner ultrabooks with tightly integrated ports and glued-in batteries generally cost more to service than older, more modular designs, simply because there’s less room to work and more disassembly required just to reach the port. A port that only handles data is usually cheaper to fix than one that also handles charging or video output, since those multi-function ports sit closer to more complex circuitry.
One of the most reliable ways to avoid a surprise bill is asking for an itemized quote before work begins. A detailed quote should separate diagnostic fees, parts, and labor, and should state clearly whether the quoted price is a flat rate or an estimate that could change once the technician opens the laptop. A parts and labor warranty is the other thing worth confirming upfront, since a repair without any warranty puts all the risk back on you if the fix doesn’t hold. Our laptop repair before replacement checklist walks through how to weigh a repair quote against the cost of simply replacing the machine, which is worth doing before you commit to board-level work on an older laptop.
How to pick a repair option and what to ask before you book
Choosing between DIY, a local shop, and an on-site technician comes down to a short list of practical questions rather than guesswork. Work through these before committing to any option.
- Ask what the diagnostic process actually involves: a technician who just glances at the port and quotes a price without testing continuity or checking drivers first is skipping steps that matter.
- Ask whether board-level work, like desoldering a connector or replacing a PD controller chip, is done in-house or sent out to a third party, since that affects both turnaround time and final cost.
- Ask about the parts warranty specifically, not just a general service guarantee, since a replacement port that fails again in a month should be covered.
- Ask how your data is handled during the repair, especially if the laptop needs to leave your sight or go to a separate facility for board-level work.
- Ask for a realistic turnaround estimate and get it in writing if the repair requires ordering a specific part.
Same-day, on-site service makes sense when the fix is a connector-level repair, a cleaning issue, or a diagnostic to confirm what’s actually wrong. A laptop that needs extensive micro-soldering, a damaged PD controller replaced, or motherboard-level trace repair is better suited to bench work with proper magnification and rework tools, since that level of precision is hard to deliver reliably outside a dedicated setup.
Watch for a few red flags regardless of which option you’re considering: a quote given with no actual diagnostic step, a vague turnaround time that keeps shifting, or a repair offered with no parts warranty at all. Any of those should make you ask more questions before handing over your laptop.
What on-site repair can realistically fix, and what Michael brings to it
On-site diagnostics and repair work well for a large share of USB port problems: cleaning, loose connector reflow, modular daughterboard swaps, and charging port issues that don’t involve deep board damage. We bring repair experience to every on-site visit, with technicians who handle hardware diagnostics, software troubleshooting, and board-level work across laptops, MacBooks, and other common devices.
Some repairs genuinely need bench-level precision, like micro-soldering a connector with lifted pads or replacing a damaged PD controller chip under magnification. We’re upfront about which category your laptop falls into after diagnostics, rather than promising a fix that a given repair type can’t reliably deliver.
If you’re planning to book a repair, having a few details ready speeds things up: your laptop’s exact model, a description of when the symptom started, photos or video of the issue, and a recent backup of your data before any hardware work begins.
Why I’d rather see a loose port fixed early than ignored
A loose USB port rarely stays a small problem. Keep forcing a cable into a connector that’s already starting to separate from the board, and you turn a reflow job into a board-level repair with a much bigger bill attached. I’ve seen the pattern often enough to trust it: the laptop owner who waits three months because the port “mostly works” ends up paying for a motherboard repair instead of a connector swap.
My own rule is simple. If software fixes don’t resolve it and the port shows any physical looseness or inconsistent connection, I’d rather pay for an early diagnostic than gamble on it getting better. Data safety factors into that decision too. A laptop that goes to a distant bench for weeks is a laptop you’ve lost control of, even temporarily, and that’s worth weighing alongside the repair cost itself.
— Michael
Getting your laptop’s USB port fixed without the runaround
If software fixes haven’t resolved your port issue and a physical inspection points to a hardware problem, on-site diagnostics save you the hassle of boxing up a laptop and waiting on a distant shop. We come to your location, diagnose the port issue on the spot, and give you a transparent, itemized quote before any work starts, with no hidden fees added later.

Here’s what we handle for USB port and charging issues specifically:
- On-site diagnostics that check drivers, power settings, and the physical port before quoting any repair.
- Connector-level repairs and modular daughterboard swaps for common charging and data port failures.
- Data-safe handling throughout the visit, so your files stay on your device rather than traveling to a third-party facility.
- Warranty-backed parts and labor on every completed repair.
Before you book, have your laptop model, a description of when the port started acting up, and a couple of photos ready. You can request an estimate or book a diagnostic visit through our on-site computer repair services page, and we’ll walk you through next steps from there.
FAQ
How much does it cost to fix a USB port on a laptop?
Cost depends on whether the fix is a simple connector reflow, a modular daughterboard swap, or a motherboard-level repair, with board-level work costing more due to the added labor and precision involved. Repair Genius provides an itemized quote after an on-site diagnostic, which is available on request through our computer repair services page.
How much does it cost to replace a laptop USB port?
A full port replacement costs more when the connector is soldered directly to the motherboard rather than mounted on a separate, modular daughterboard, since direct-to-board designs require desoldering and more precise rework. Parts cost also rises for ports that handle charging or video output in addition to data, since those modules are more complex to source and install.
Can a USB port on a laptop be replaced?
Yes, a damaged USB port can usually be replaced, whether it’s a modular daughterboard swap or a connector soldered directly to the motherboard. The feasible approach depends on the port’s design and the extent of any damage to the surrounding board, which a technician determines through diagnostic inspection and continuity testing.
Can a bad USB port be fixed?
Many USB port problems are software or power-management issues rather than physical damage, and roughly 40 to 60% of sudden port failures resolve through driver updates and power setting changes. When the port itself is physically loose, corroded, or damaged, a reflow, connector replacement, or board-level repair can usually restore function, depending on how much of the board is affected.
Sources
- How can I diagnose and fix a corrupt USB port in Windows 10?
- Fix USB-C problems in Windows | Microsoft Support
- Laptop USB-C port inspection (solder diagnostic) | LaptopJudge
Recommended
- Laptop Charging Port Repair Steps: DIY Guide
- Laptop Repair Before Replacement Checklist 2026
- Types of Business Laptop Repairs: 2026 Guide
- Signs Your Laptop Needs Immediate Repair: 2026