Try Recovery mode first, always. It loads iBoot, the software bootloader Apple controls, and it fixes most stuck logos and failed updates without touching your data. DFU mode skips iBoot entirely and talks directly to the BootROM/SecureROM chip burned into the hardware. Reach for DFU only after Recovery fails, or for specific jobs like signed downgrades and stripping a broken jailbreak.
TL;DR:
- Recovery mode is easier and safer, displaying a cable icon and allowing updates or restores that usually preserve data; DFU mode is more complex with a black screen and is used for damaged bootloaders or downgrades.
- Entering DFU requires precise timing and consecutive attempts, and it should only be used when Recovery mode cannot load or the device has severe firmware issues.
- Back up all data before restoring in either mode, as DFU and full restores typically erase everything; recovery mode’s update option can sometimes preserve data.
- Hardware damage, liquid exposure, or a cracked logic board make software solutions ineffective and require professional diagnosis rather than repeated DFU restores.
- Always use certified cables, update your computer software, and attempt Recovery mode first; professional diagnostics are recommended if recurring issues happen or hardware damage is suspected.
Table of Contents
- iPhone DFU vs Recovery Mode: A Quick Comparison
- What Recovery Mode Actually Does
- What DFU Mode Is and Why It’s Different
- Deciding Between Recovery and DFU: A Simple Flow
- How to Enter and Exit Each Mode Without Bricking Your Phone
- Protecting Your Data Before You Restore Anything
- The Real Risks and How to Cut Failure Rates
- When DIY Stops Making Sense: A Repair Shop’s View
- Get On-Site Diagnostics When DIY Fixes Fall Short
- Sources
iPhone DFU vs Recovery Mode: A Quick Comparison
The fastest way to tell these two apart is to look at your screen. One shows you something. The other shows you nothing at all.
Recovery mode displays a cable pointing at a laptop icon (or, on older software, an iTunes logo), because the phone is still running enough of its own code to draw graphics. DFU mode leaves the display completely black, since the phone isn’t loading iOS or even the bootloader that would normally paint that screen. That black, unlit screen is the definitive signal you’re in DFU, not a wrong button combo or a frozen phone.
| Factor | Recovery mode | DFU mode |
|---|---|---|
| What loads | iBoot (software bootloader) | Nothing; talks directly to BootROM/SecureROM |
| Screen indicator | Cable/computer icon | Completely black screen |
| Typical use | Failed updates, boot loops, stuck logo | Corrupted bootloader, signed downgrades, jailbreak removal |
| Difficulty | Moderate; documented by Apple | High; undocumented, precise timing required |
| Data outcome | Update can preserve data; Restore wipes it | Restore typically wipes the device |
| Apple support | Officially documented and supported | Not documented for consumer use |
Apple’s own support flow leans on Recovery as the first step in any restore, which is a good reason to start there before anything more aggressive.
What Recovery Mode Actually Does
Recovery mode put your iPhone into a state controlled by iBoot, the software bootloader Apple can update and patch through normal iOS releases. Because iBoot is still running, the phone can talk to Finder or iTunes, accept new firmware, and enforce Apple’s downgrade protections so you can’t accidentally install an older, less secure iOS version.
Once connected, you get two options that behave very differently:
- Update: Reinstalls iOS while attempting to keep your photos, apps, and settings intact. This works when the operating system is damaged but the file system underneath is still healthy.
- Restore: Wipes the device completely and installs iOS fresh, then offers to reload from a backup.
Recovery mode is the tool built for the problems most people actually run into:
- The phone is stuck on the Apple logo after a botched update.
- iOS crashes and reboots in a loop but the phone still powers on.
- An update download or installation failed partway through.
- The device won’t sync or respond in Finder but otherwise turns on normally.
You’ll know you’re in Recovery mode because the screen shows that cable connecting to a laptop or iTunes icon, confirming the phone recognizes it’s plugged into a computer. Apple documents this entire process because it’s meant for regular users, not technicians. That’s also why it should be your default move any time an iPhone misbehaves after a software update.
What DFU Mode Is and Why It’s Different
Device Firmware Update mode is a hardware-level interface, not a software feature. It bypasses iBoot completely and communicates directly with the BootROM and SecureROM chip that’s physically burned into the device at the factory. Nothing about DFU can be patched by an iOS update, because it doesn’t live in iOS at all. That permanence is exactly why Apple can’t push a fix to it and, not coincidentally, why the company has never published official consumer instructions for entering it.
Because DFU sits below iBoot, it can accept signed firmware even when the bootloader itself is corrupted, something Recovery mode simply cannot do. That capability opens up a short list of legitimate use cases:
- Restoring a phone whose bootloader has been damaged or corrupted, where Recovery mode won’t even load.
- Performing a downgrade to an older, still-signed iOS version.
- Removing a failed or unstable jailbreak that left the phone unbootable.
- Reinstalling baseband and firmware components that a standard Restore can’t touch.
DFU also returns far less diagnostic information than Recovery mode. Where Recovery can often surface a model number, serial, or IMEI, DFU gives forensic and repair tools much less to work with, which is part of why professionals treat it as a specialized instrument rather than a general troubleshooting step.
Pro Tip: If your screen shows an Apple logo at any point while trying to enter DFU, you didn’t make it. The phone restarted instead. Power it off completely and try the button sequence again from scratch.
Deciding Between Recovery and DFU: A Simple Flow
Work through these steps in order rather than jumping straight to the more aggressive option.
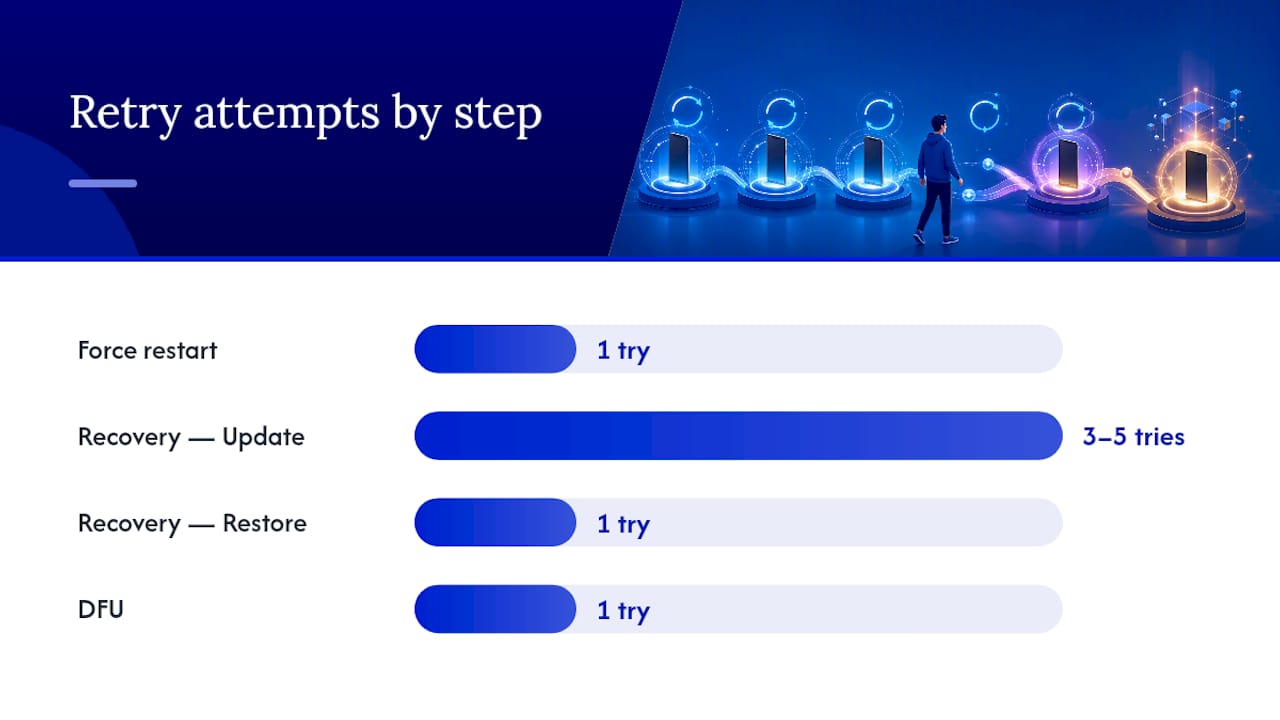
- Force restart first. Half of all “stuck” iPhones just need a hard reset (volume down plus side button, held until the Apple logo appears) before you touch a computer at all.
- Try Recovery mode and choose Update. This is the path most likely to fix the phone without erasing anything.
- If Update fails, try Restore within Recovery mode. You’ll lose data on the device itself, but your most recent backup will cover the gap.
- If Recovery mode won’t even load, meaning the phone won’t show the cable icon no matter what you try, move to DFU.
- Use DFU specifically for a corrupted bootloader, a signed downgrade, or clearing out a broken jailbreak. These are the scenarios where DFU is genuinely the right tool, not just the more dramatic one.
A short checklist helps here. Favor Recovery when the phone still boots partway, shows the Apple logo, or responds to Finder in any way. Favor DFU only when Recovery mode itself won’t initiate, or when you specifically need to install firmware that a locked bootloader is refusing to accept.
One more thing worth saying plainly: if the phone shows signs of physical damage, water exposure, or a swollen battery, stop. No amount of button sequencing fixes a cracked logic board or corroded connector, and repeated restore attempts on damaged hardware can make things worse. That’s a job for a bench, not a keyboard shortcut.
How to Enter and Exit Each Mode Without Bricking Your Phone
Before touching any button combination, confirm three things: the phone has enough charge to survive a restart cycle, you’re using a cable that isn’t fraying or loose, and you have a computer running a current version of Finder or iTunes. Keep the phone connected throughout the entire process. Disconnecting mid restore is one of the fastest ways to end up with a phone that won’t boot at all.
Button combinations for both modes vary by model, so treat any specific combo you read online as a starting point rather than gospel, and check Apple’s own instructions for your exact hardware. As newer iPhones ship, the physical layout and required steps keep shifting, which is exactly why a combo that worked on last year’s model can fail on this year’s.
- Connect the phone to your computer and open Finder or iTunes.
- Follow your model’s specific button sequence for Recovery (you’re aiming for the cable icon) or DFU (you’re aiming for a screen that stays completely black).
- Watch the screen closely. An Apple logo appearing means you overshot into a normal restart, not DFU. Power off and retry.
- Let Finder or iTunes detect the device, then choose Update or Restore as appropriate.
- To exit either mode, hold the side button (or top button on older models) for several seconds until the phone restarts normally.
Getting DFU’s timing right on the first attempt is uncommon. Three to five tries is a normal range before you land the sequence correctly, so don’t treat a failed first attempt as a sign something is broken. If the phone won’t exit either mode after holding the button for 15 to 20 seconds, disconnect the cable, wait a minute, and try the exit sequence again.
Protecting Your Data Before You Restore Anything
Entering Recovery or DFU mode by itself does not erase anything on the phone. The risk comes from what you choose once you’re there. Update in Recovery mode can preserve your data if the underlying file system is intact, but Restore in Recovery and any DFU-based restore will wipe the device and reinstall iOS from scratch.
Back up before you do anything else, using whichever of these fits your situation:
- iCloud backup, if the phone still has working Wi-Fi and enough storage in your account.
- Finder or iTunes backup on a computer, which captures more data types and doesn’t depend on cloud storage limits.
- Third-party backup tools for contacts, photos, or messages if the phone is too unstable to complete a full system backup.
If the phone is already unresponsive and won’t let you back up before attempting a fix, don’t force a Restore hoping it’ll be fine. Check what a professional data recovery service can pull first, because some data recovery paths only work before a device is wiped, not after. If you’re prepping ahead of any repair visit, a quick contact transfer takes a few minutes and can save a lot of regret.
The Real Risks and How to Cut Failure Rates
The single biggest risk in either mode is interrupting a firmware write mid-process, whether that’s a loose cable, a computer that sleeps, or a USB port that drops the connection. That interruption is how phones actually get bricked, far more often than the mode itself being risky.
Run through this checklist before you start:
- Use an Apple-certified or high-quality cable, plugged directly into the computer rather than through a hub.
- Update Finder, iTunes, or your device drivers before attempting either mode.
- If one computer keeps failing to detect the phone, try a second machine before assuming the phone is at fault.
- Always attempt Recovery mode before DFU. It’s safer and solves the overwhelming majority of cases.
- Give yourself a reasonable retry limit. If DFU won’t cooperate after five or six careful attempts, the issue is likely hardware, not technique.
Pro Tip: Technicians often inspect and gently clean the charging port before any DFU attempt, since a dirty or slightly bent connector causes intermittent detection that looks exactly like a software failure.
When DIY Stops Making Sense: A Repair Shop’s View
Liquid exposure, a cracked charging port, or a phone that took a hard fall changes the calculation entirely. Software fixes can’t repair a corroded logic board, and running repeated DFU restores on hardware that’s already failing tends to stress it further rather than help. Technicians look for those signals first, before touching a restore.
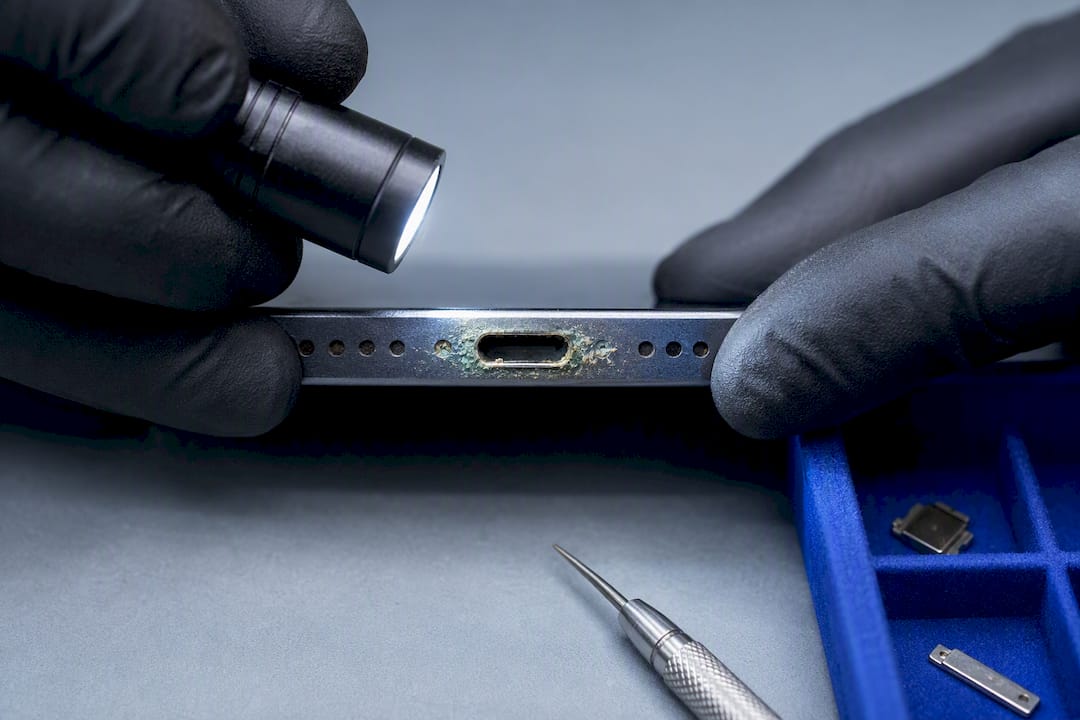
The other difference in how a shop approaches this: we try to avoid unnecessary restores altogether when data matters. Board-level checks and port inspections can often diagnose a problem without ever wiping the device, which is the opposite of what a DIY DFU attempt risks doing by default.
Technicians handle this kind of diagnostic work on-site, the same day, with transparent pricing quoted before any work begins. When a phone’s data is the priority and the hardware is questionable, that in-person, data-conscious approach beats a series of restore attempts at home.
— Michael
Get On-Site Diagnostics When DIY Fixes Fall Short
An alternative to a repair-shop drop-off when your iPhone survives every attempted fix but still won’t come back to life is to have a certified technician come to your home or office and look at the actual hardware the same day.

That matters most in exactly the scenario this article covers: Recovery failed, DFU either won’t initiate or has completed but the phone still misbehaves, and you suspect something physical is wrong. Technicians run diagnostics on-site, quote pricing upfront with no hidden fees, and prioritize keeping your data intact rather than defaulting to a wipe. If your device shows signs of liquid damage, a failing port, or repeated crashes that survived a full Restore, that’s a hardware conversation, not a software one, and it’s worth having in person.
If you’d rather skip the guesswork and multiple DFU attempts entirely, book a diagnostic visit with Repair Genius and get a straight answer about whether your iPhone needs a restore, a repair, or something in between.
Sources
- Everything You Need to Know About DFU Mode for iOS Devices – iFixit
- Everything about iOS DFU and Recovery Modes | ElcomSoft blog
- Put iPhone into DFU Mode: 2026 Steps for All Models – Softorino
Recommended
- Why Device Repairs Fail: Common Mistakes Explained
- Face ID Repair: Quick Fixes and When to Get Help
- iPhone 16 Repair: How to Get It Fixed Fast and Safely
- iPhone Screen Repair Process Explained for 2026