Start by swapping the cable and wall adapter, trying a different outlet, and testing wireless charging if your phone supports it. These basic swaps fix most cases. If your screen shows a “liquid or debris” or “check charging accessory” warning, or the phone feels very hot or looks swollen, stop charging and follow safety guidance before trying anything else.
TL;DR:
- A fully drained phone may stay blank while recovering, so leave it on a verified wall charger for 10 to 30 minutes before judging.
- Stop charging immediately for swelling, a burning smell, persistent heat, or a liquid warning that lasts two hours; these signs call for professional help.
- Turn the phone off before clearing lint, use only a nonconductive tool or brief compressed air, and avoid liquids or metal pins.
- If a working charger, port cleaning, and restart fail, a technician can test the battery, charging circuit, or display; board faults need specialized equipment.
Table of Contents
- Likely causes at a glance
- Quick checks to run first (under 10 minutes)
- Inspecting and cleaning the charging port safely
- Software and settings checks that affect charging
- Battery and hardware signs that need professional repair
- When to book a pro and what to expect from on-site repair
- How long to wait when the battery is fully discharged
- Diagnosing hardware faults beyond the charging port
- Typical repair options and costs for Android charging issues
- Expected repair turnaround for Android charging problems
- Preventing future charging issues
- A prioritized quick plan for busy readers
- Get your Android charging port or battery fixed today
- FAQ
- Sources
Likely causes at a glance
When an Android phone won’t charge, the cause usually falls into one of five buckets. Matching your symptom to the right one saves time and keeps you from poking at parts that don’t need attention.
- A worn cable, a failing adapter, or a low-wattage charger that can’t keep up with the phone’s demand.
- A dirty, bent, or wet charging port that blocks the cable from making full contact.
- Software or a runaway app draining power faster than the charger replaces it, so the percentage never climbs.
- Battery degradation or a failing internal charging circuit that no longer accepts or regulates current properly.
- A screen or display fault that hides real charging activity behind a blank or frozen screen.
Each of these has its own troubleshooting path, and most people can rule out the first three without any tools. The last two usually point toward professional diagnosis, which we cover further down.
Quick checks to run first (under 10 minutes)
Before assuming the worst, work through this short sequence. It covers the fixes that solve the majority of charging complaints.
- Swap in a cable and power adapter you know work on another device, and confirm the adapter supplies enough power for your phone.
- Remove the phone case and any magnetic mount, then try wireless charging if your phone supports it, since this bypasses the port entirely.
- Plug into a different wall outlet directly. Avoid testing through a computer’s USB port or a weak charger, since both can mask a real problem.
- Open Settings > Battery to check charging status and see which apps have been draining power recently, then restart the phone before moving to deeper steps.
Official Android Help troubleshooting lists this same sequence, cable and adapter swap, port check, case removal, and a minimum charging window, as the standard first pass for a phone that won’t charge.
Pro Tip: If you’re unsure whether your adapter is strong enough, check the wattage printed on the brick itself. A phone pulling more power than the adapter delivers will charge slowly or not at all.
Inspecting and cleaning the charging port safely
If the quick checks don’t help, the port itself is the next suspect. Lint, pocket debris, and moisture are common, and clearing them is safe when done carefully.
- Turn the phone off before touching the port, and never use any liquid to clean it.
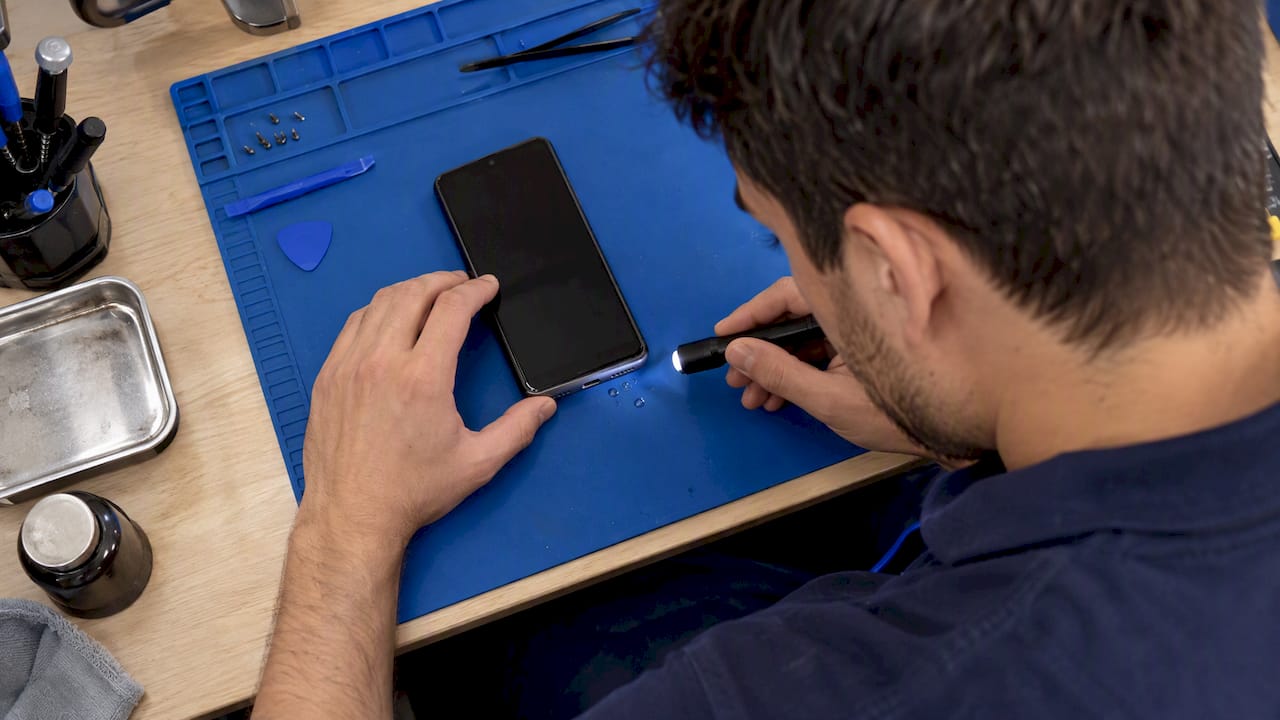
- Use a non-conductive tool, such as a wooden toothpick or a plastic brush, or short bursts of compressed air. Avoid metal pins, which can short the contacts.
- If the cable only sits at an angle, the pins look bent, or you spot corrosion, stop cleaning and seek professional repair instead.
- If your phone showed a “liquid or debris” or “unplug charger” message, follow the official wait-and-retry sequence before you reconnect or change USB settings.
Careful port cleaning with non-conductive tools often restores a proper connection when lint is the culprit, according to Android Authority’s USB-C cleaning guide. Official Pixel Phone Help also notes that if the “liquid or debris” warning persists for two hours or keeps returning, the right move is contacting support rather than continuing to charge.
Software and settings checks that affect charging
If the port and cable both check out, software is worth ruling out next. A misbehaving app can pull more power than the charger supplies, which makes the phone look like it isn’t charging at all.
- Force-restart the phone with a long press of the power button, then plug it back in and watch for a change.
- Open Settings > Battery to confirm the system reports a charging state and to spot any app using an unusual amount of power.
- Boot into safe mode to rule out a third-party app causing excess drain, then uninstall or update anything suspicious.
- If the screen stays blank, charge for 10 to 30 minutes before trying a manufacturer button sequence or connecting the phone to a computer to check for activity.
Charging problems that appear right after an update often trace back to background drain rather than hardware, and restarting plus a battery-usage check is usually enough to confirm it, per iFixit’s troubleshooting notes.
Battery and hardware signs that need professional repair
Some symptoms mean it’s time to stop troubleshooting and book a repair rather than keep experimenting.
- Visible battery swelling, a burning smell, or a phone that stays hot well after you unplug it: stop charging and get it looked at.
- Repeated “liquid or debris” warnings lasting two hours or more, or a recurring “unplug charger” message, which Pixel support treats as a signal to contact a repair service rather than keep trying.
- The phone vibrates or rings when plugged in but the screen stays black, which can point to a display fault a technician can test separately from the battery.
- A connector that only seats at an angle, which usually means port or housing damage that needs a part swap, not more cleaning.
When to book a pro and what to expect from on-site repair
Book a repair once you’ve hit any of the triggers above: swelling, a safety warning that won’t clear, visible port damage, or basic troubleshooting that led nowhere. Common fixes at this stage include charging-port replacement, battery replacement, moisture diagnosis, and board-level checks for a faulty charging circuit.
We offer same-day, on-site repair visits, so your phone never leaves your sight and your data stays with you throughout the repair. Pricing is quoted up front with no hidden fees. Before the technician arrives, back up what you can, have your phone model ready, and set aside any chargers you’ve already tested so the diagnosis goes faster.
How long to wait when the battery is fully discharged
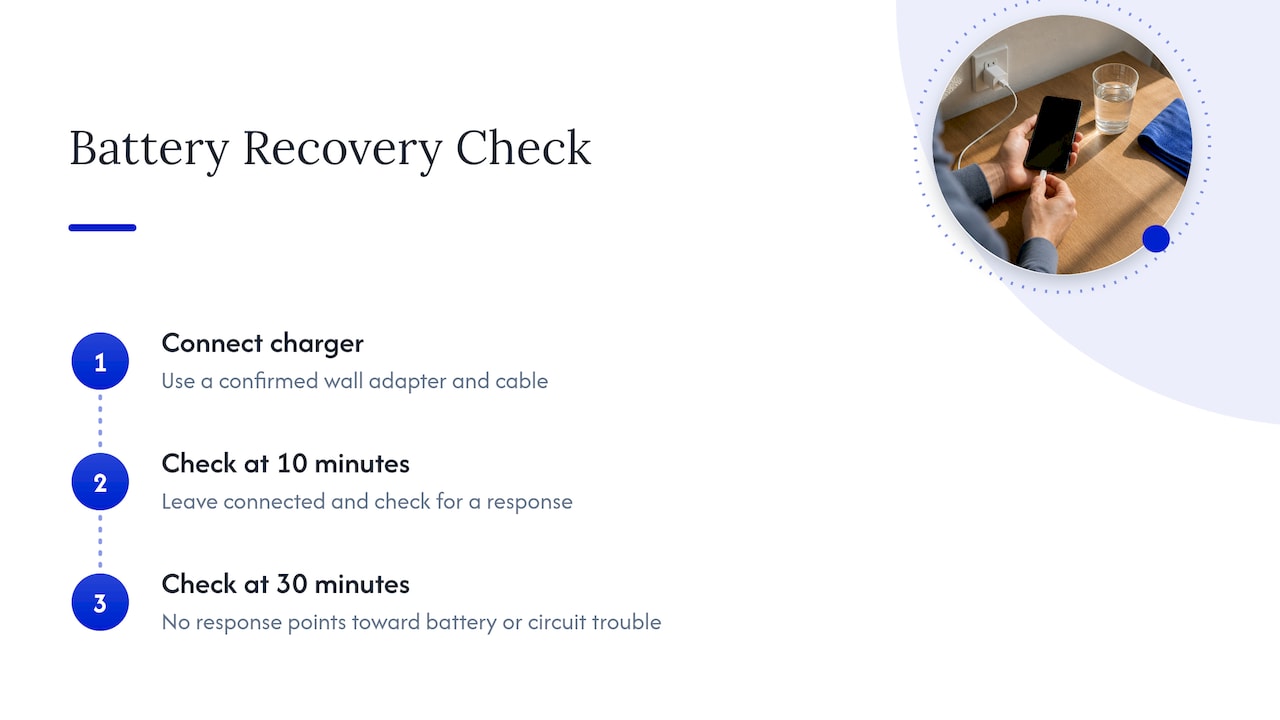
A battery drained to zero needs a minimum voltage before the phone will show any sign of life, including the charging icon or a boot screen. That’s normal, not a fault. Device support guidance recommends giving it 10 to 30 minutes on a known-good charger before judging whether it’s actually charging, since a completely dead battery can sit with a blank screen for several minutes even while current is flowing into it, according to Pixel Phone Help.
Use the wall adapter and cable you already confirmed work, not a USB port on a laptop, since weaker sources slow this recovery window further. If you still see nothing after half an hour, with the LED unlit and no vibration when you press the power button, that points away from a simple deep-discharge situation and toward a battery or charging-circuit problem.
It’s worth resisting the urge to unplug and replug repeatedly during this window. Constant interruption can reset the charging handshake and make a slow-starting battery look dead when it’s actually recovering. Leave it connected, check back at the 10-minute and 30-minute marks, and only move to deeper diagnostics if there’s still no response.
Diagnosing hardware faults beyond the charging port
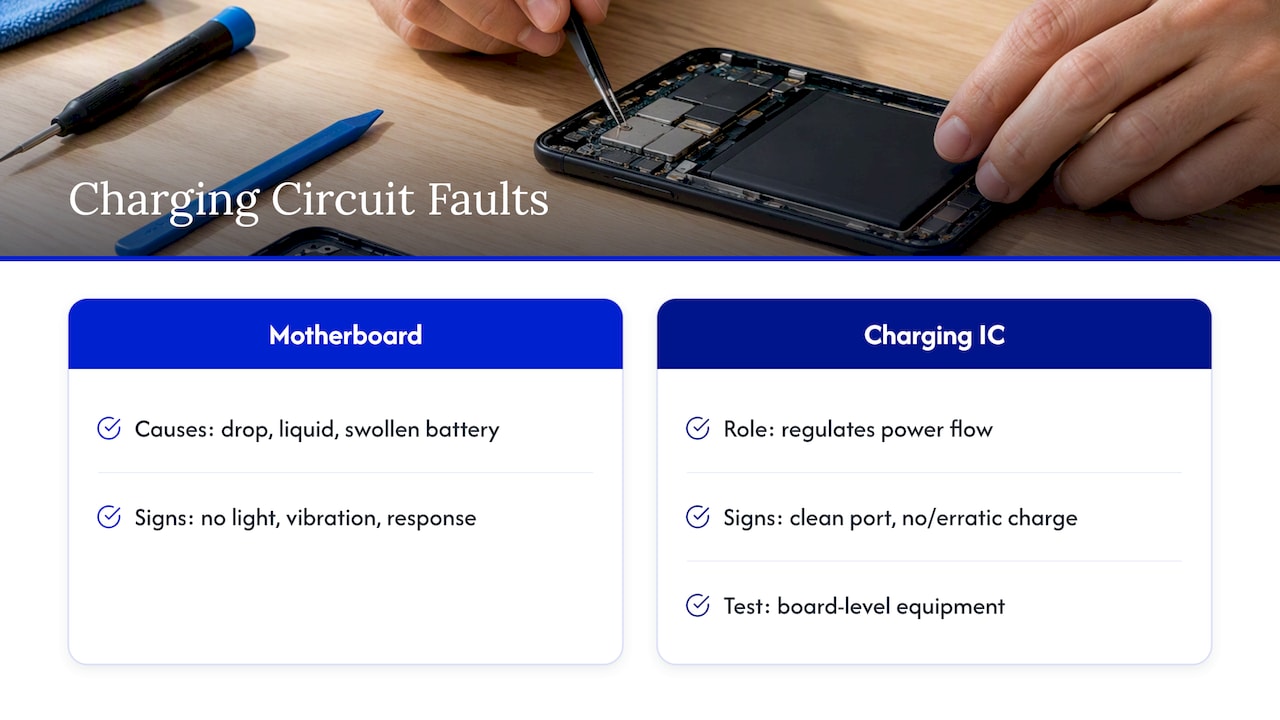
Not every charging failure lives in the port. Two deeper faults show up often enough to mention: motherboard damage and charging IC failure.
A charging IC (integrated circuit) regulates how power moves from the port to the battery. When it fails, the phone can show a fully clean port, a known-good cable, and a confirmed working adapter, yet still refuse to charge or charge at an erratic rate. This component isn’t something you can test with a toothpick or a flashlight. It requires board-level diagnostic equipment, which is why a phone that fails every basic check usually needs a technician rather than another round of cleaning.
Motherboard damage, often from a prior drop, liquid exposure, or a swollen battery pressing on nearby components, can produce symptoms that look identical to a bad port: no charging light, no vibration, no response. The tell is usually a combination of signs rather than one: a phone that got wet weeks ago and now won’t charge, or one that took a hard fall right before the problem started.
If you’ve swapped cables, cleaned the port, confirmed the battery isn’t just deeply discharged, and the phone still won’t take a charge, that combination of ruled-out causes is itself useful diagnostic information. It narrows the problem to the board or the charging circuit, and that’s the point where on-site diagnostic testing replaces guesswork.
Typical repair options and costs for Android charging issues
Once a technician confirms the fault, the fix usually falls into one of a few categories. A charging-port replacement addresses worn or corroded contacts and is the most common repair when cleaning didn’t help. A battery replacement addresses swelling, rapid drain, or a battery that won’t hold a charge even when the port tests clean. Board-level repair, covering a failed charging IC or related motherboard damage, is less common but necessary when the first two don’t resolve the symptom.
We quote pricing up front after a diagnostic, with no hidden fees added once the job starts. Costs vary by phone model and which component needs replacing, since a flagship’s charging assembly differs from a budget phone’s, so we treat the quote stage as the place to get an exact number for your device rather than relying on a generic figure. In most cases, a repaired charging port or battery costs meaningfully less than replacing the phone outright.
Expected repair turnaround for Android charging problems
Because we come to you, most Android charging repairs, including port replacement and battery swaps, are completed the same day, often within the visit itself once the technician confirms the part needed. Board-level repairs involving a charging IC or motherboard damage can take longer, since they sometimes require additional diagnostic time or a part that isn’t carried on every visit.
Compare that to mailing a phone to a manufacturer or waiting for an appointment slot at a shop, where turnaround commonly stretches to several days just for shipping and queue time, on top of being separated from your phone and its data the whole time. An on-site same-day visit removes most of that waiting.
Preventing future charging issues
A few habits cut down on repeat trips. Charge with the cable and adapter that came with your phone, or a comparable replacement, rather than whatever cheap cord is closest. Keep your phone’s pocket or bag reasonably free of lint near the charging port opening, since that buildup is one of the most common causes of a loose or failed connection. Avoid charging in direct sunlight, a hot car, or under a pillow where heat has nowhere to go, since sustained heat accelerates battery wear.
Unplug the phone once it reaches full charge rather than leaving it connected overnight for months on end, and avoid letting the battery repeatedly drain to zero before charging again. If you use a case, check occasionally that it isn’t trapping debris against the port. None of these habits require extra time, but together they extend how long a charging port and battery stay reliable. For a deeper look at charger wattage and protocol mismatches that cause slow charging, see our guide to fixing slow phone charging.
A prioritized quick plan for busy readers
If I had five minutes, I’d swap the cable and adapter first, then check the port for lint or damage. Those two steps resolve most charging complaints I hear about. If you see swelling, repeated safety warnings, or a connector that only seats at an angle, stop troubleshooting and book professional repair, both for your safety and to protect the data on the phone. On-site repair also beats shipping a phone off or waiting days for a shop appointment when you need it working again quickly.
— Michael
Get your Android charging port or battery fixed today
If cable swaps, port cleaning, and a restart haven’t solved it, the fix is probably hardware, and that’s where we come in. We send a technician to your location in Orlando or Winter Park the same day, test your chargers and port on the spot, and give you a clear quote before any work starts.

- Same-day on-site visits for charging-port and battery repair, with no trip to a shop required.
- Transparent pricing with no hidden fees, confirmed before we touch your phone.
- Your data stays with you throughout, since the repair happens where you are.
For a water-related warning message instead of a simple charging fault, our water damage guide covers the right first steps. When you’re ready, book a diagnostic through our cellphone repair page and we’ll take it from there.
FAQ
Why is my battery plugged in but not charging?
This usually means the charger output is being offset by heavy background activity or overheating, so the phone draws as much power as it receives. Checking Settings > Battery for high-drain apps and letting the phone cool down often resolves it, according to Motorola’s charging guidance.
What does it mean if my phone is slow charging?
Slow charging typically means the adapter isn’t supplying enough power for the phone’s current demand, especially during heavy use. Using a PD or PPS-rated adapter and reducing background activity usually speeds things back up, per Motorola support.
How do I clean an Android charging port safely?
Turn the phone off, then use a non-conductive tool like a plastic pick or short bursts of compressed air to clear lint or debris, never a metal pin or liquid. This approach is recommended in Android Authority’s cleaning guide because metal tools risk shorting the contacts.
Why is my Motorola Edge phone not charging?
The same fundamentals apply: start with a known-good cable and an adapter that meets the wattage Motorola recommends for your model, since a weak charger can fail under heavy usage. If the port looks clean and the adapter is adequate but charging still fails, that points toward a battery or charging-circuit issue worth having tested, per Motorola’s own charging guidance.
When should I stop troubleshooting and call a repair technician?
Stop immediately if you see swelling, a burning smell, persistent overheating, or a “liquid or debris” warning lasting two hours or more, as Pixel Phone Help advises contacting support at that point. A port that only accepts the cable at an angle also signals physical damage that needs professional repair rather than more cleaning.
Sources
- Fix an Android device that won’t charge or turn on – Android Help
- How to clean a USB-C port and fix charging
- How to properly charge the device – Motorola Support US
Recommended
- Fix Slow Phone Charging Fast: 30W+ Charger, 15 Minute Test, When to Repair
- Save Your Data: Fix Android Boot Loops in Orlando Without a Reset
- Fix iPad Not Charging: Fast Troubleshooting Guide
- Why Your Android Phone Keeps Freezing: Causes & Fixes