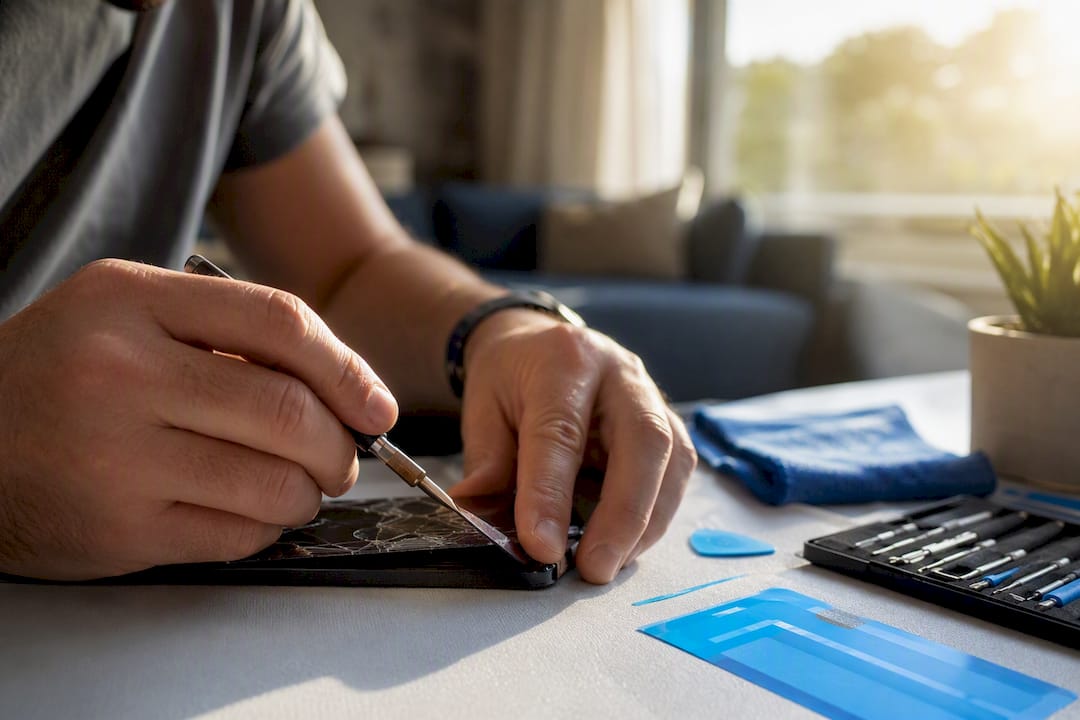
If your iPhone’s back glass is cracked, the fastest safe fix is Apple or an Apple Authorized Service Provider (AASP) if you still have AppleCare+ or want genuine parts and a real warranty. If you’re past warranty and want to save money without sacrificing quality, a reputable local repair pro (in-shop or on-site) is usually the better trade-off. DIY only makes sense if you’ve replaced phone components before and don’t mind the risk of a failed wireless charging coil.
Cost depends heavily on the route:
- Apple, with AppleCare+: often a flat, discounted service fee
- Apple or AASP, out of warranty: the priciest option, but backed by Apple’s repair warranty
- Independent repair shop or on-site service: frequently a fraction of Apple’s out-of-warranty price
- DIY parts and tools: the cheapest on paper, but with zero labor warranty
Pro Tip: Before you book anything, check your AppleCare+ status in Settings and confirm whether your plan includes Express Replacement Service. If you go the repair route (professional or DIY), the job isn’t finished until you complete pairing through Apple’s Repair Assistant (Settings → General → About → Parts & Service History → Restart & Finish Repair) — skip it, and features tied to the new part may not register correctly.
Key Takeaways
The safest, most cost-efficient path to a repaired iPhone back glass depends on your warranty status, timeline, and comfort with hands-on tech work, not on any single “best” option.
| Point | Details |
|---|---|
| Check AppleCare+ first | Confirm coverage and Express Replacement eligibility before choosing any repair route. |
| Match route to priority | Apple/AASP for warranty documentation, independent or on-site pros for speed and cost balance. |
| DIY carries real risk | Paired charging coils on newer models raise the odds of a costly mistake without professional tools. |
| Never skip calibration | Complete Apple’s Repair Assistant pairing after any replacement, professional or DIY. |
| Get warranty terms in writing | Apple backs genuine parts for 90 days or your remaining coverage; ask shops to match it. |
| Repair Genius offers on-site convenience | Same-day, on-site iPhone back glass repair in Orlando and Winter Park with transparent pricing and a parts and labor warranty. |
Table of Contents
- What Are Your Options For iPhone Back Glass Replacement?
- How Does Professional iPhone Back Glass Repair Work?
- Is DIY iPhone Back Glass Replacement Realistic?
- What Does It Cost and How Long Does It Take?
- What Can Go Wrong After A Back Glass Repair?
- Why Choose On-Site Repair For Your iPhone’s Back Glass?
- What Actually Matters When Deciding On A Repair Route
- Get Your iPhone Back Glass Fixed Without Leaving Home
- Sources
What Are Your Options For iPhone Back Glass Replacement?
Every route to a fixed back panel comes with its own math on price, speed, and risk. Here’s the honest breakdown of each.
- Apple or an AASP: Genuine parts, official warranty, but the slowest and most expensive path if you’re out of warranty.
- Independent repair shop: Faster turnaround and lower prices, with quality varying by shop, so vetting matters.
- On-site repair service: A technician comes to you, often same day, combining shop-level skill with house-call convenience.
- Mail-in repair: Useful if there’s no shop nearby, but you lose your phone for days and ship it uninsured unless you pay extra.
- DIY replacement kit: The cheapest option upfront, but you assume all the risk of a botched adhesive seal or a damaged wireless coil.
Choose Apple or an AASP when you’re still under AppleCare+ or need documented warranty work for resale or insurance purposes. Choose an independent or on-site pro when you’re out of warranty and want speed without the DIY risk. Choose DIY only if you’ve opened a phone before, have steady hands, and accept that a mistake could cost more than the repair itself.
Pro Tip: Whichever professional route you pick, ask for the part’s origin (genuine, refurbished OEM, or aftermarket) and get the labor and parts warranty in writing before the technician starts. A shop that won’t put its warranty on paper is telling you something.
How Does Professional iPhone Back Glass Repair Work?
Professional repair splits into two real categories: Apple’s own service network, and everyone else. Knowing how each operates changes how you shop for a fix.
Apple’s process is the most standardized. You book through the Apple Support app, Apple’s repair page, or by visiting an Apple Store, and Apple diagnoses the phone before quoting a final price. If you have AppleCare+, accidental damage coverage kicks in, and depending on your plan you may qualify for Express Replacement, where Apple ships you a replacement unit before you send back the damaged one. Without AppleCare+, you pay Apple’s standalone out-of-warranty repair rate, which sits well above the AppleCare+ price for the same job. Either way, genuine parts installed through Apple carry a 90-day parts and labor warranty, or the rest of your original coverage term if that’s longer.
- Book the appointment online or through the Support app, selecting “back glass” or “damage” as the issue.
- Get a diagnostic quote, which can shift slightly if the technician finds hidden damage once the panel is opened.
- Choose in-store, mail-in, or (if available) an in-person Genius Bar visit, depending on what your local Apple presence supports.
- Confirm parts pairing happens automatically before pickup, since Apple technicians handle Repair Assistant as part of the service.
AASPs run the same genuine-parts playbook under Apple’s certification but often have shorter wait times and more flexible scheduling than a corporate Apple Store, since they’re independently owned. Pricing tends to land close to Apple’s own out-of-warranty rate, sometimes slightly lower.
Independent shops are where due diligence matters most. Before you commit, verify:
- Parts sourcing. Ask directly whether the back glass is OEM, refurbished OEM, or aftermarket. Aftermarket glass can look identical but fit imperfectly around the camera housing.
- Written warranty terms. A verbal “we’ll take care of it” is not a warranty. Get the coverage period and what it covers on paper or in a text confirmation.
- Data-handling policy. Ask whether the shop needs your passcode and what happens to your data during the repair. Reputable shops don’t need your Apple ID or cloud credentials for a glass swap.
- A firm, itemized quote. Parts, labor, and any diagnostic fee should be broken out before the tech starts, not tallied afterward.
Repair Genius technicians follow this same structured repair process on-site, which means you get the parts transparency and diagnostic rigor of a good shop without having to sit in one.
Is DIY iPhone Back Glass Replacement Realistic?
DIY is realistic for someone comfortable with small tools and patient work, but the model you own changes the difficulty considerably. Apple’s own guidance on newer designs notes that post-iPhone 15 models allow easier access to internal components from both the front and back, which simplifies back glass removal compared with several older generations. That’s a genuine improvement, but “easier” doesn’t mean “easy.”

The bigger complication on newer phones is what sits underneath the glass. iFixit’s iPhone 16 guides document that some back-glass assemblies now include wiring or components paired directly to the logic board, which raises both the technical difficulty and the stakes of a mistake. Get the adhesive seal wrong or nick a ribbon cable, and you’re not just looking at a cosmetic redo, you could lose wireless charging or MagSafe alignment entirely.
Here’s the realistic high-level workflow, based on iFixit’s step-by-step process:
- Heat the perimeter of the back glass to soften the factory adhesive, typically with a heat gun or dedicated heating pad.
- Separate the glass carefully using suction cups and thin prying tools, working slowly around the edges to avoid cracking it further or bending the frame.
- Disconnect the wireless charging coil and any other cabling attached to the old panel before fully removing it.
- Clean the frame of old adhesive residue and apply fresh adhesive strips or liquid adhesive sized for your model.
- Reinstall the new back glass, reconnect the coil and cabling, and let the adhesive cure under light pressure.
- Pair the new part using Apple’s Repair Assistant so the system recognizes the replacement component.
Expect to spend on tools (heat gun, suction cups, spudgers, adhesive) plus the glass panel itself, with the total typically running well below what a shop charges for labor, since you’re only paying for parts. That savings comes with zero labor warranty. If something goes wrong mid-repair, you’re troubleshooting it yourself.
The calibration step deserves its own emphasis. Apple’s guidance makes clear that some replacement components need to be recognized through Repair Assistant before the phone will treat them as genuine, and skipping this step can leave features tied to that part non-functional or flagged with a warning. Even a physically perfect glass swap fails the job if you never open Settings → General → About → Parts & Service History → Restart & Finish Repair to complete it. Professionals routinely test wireless charging and camera function before handing the phone back, precisely because a bent clip or damaged coil can pass a visual check but still cause intermittent faults later. If you’re working on a recent iPhone 16, budget extra time for the paired-component complexity Apple and iFixit both flag.
What Does It Cost and How Long Does It Take?
Cost bands split cleanly by route. Apple or an AASP sits at the top of the range for out-of-warranty repairs, though AppleCare+ coverage drops that price substantially, often to a fixed service fee regardless of retail part cost. Independent and on-site shops typically land in the middle, and DIY parts-and-tools costs sit at the bottom, assuming nothing goes wrong.
- Apple or AASP, no AppleCare+: highest bracket, reflecting genuine parts and Apple’s labor rate.
- Apple with AppleCare+: a flat, discounted fee, sometimes with Express Replacement available.
- Independent shop or on-site technician: moderate, usually well under Apple’s uncovered rate.
- DIY kit: lowest upfront cost, but you’re the labor and the warranty.
Several factors push prices around within those bands. The model matters most, since phones with more integrated components behind the glass, like a paired charging coil, take longer to service and cost more in labor. Part availability plays a role too. If a shop has to order your model’s glass, expect the wait to stretch.
Timelines follow a similar pattern. Same-day service is common for in-store, on-site, and walk-in shop repairs when parts are in stock. Mail-in repair through Apple typically takes several business days once Apple receives the device, plus shipping time both ways. On-site appointments compress that timeline the most since there’s no drop-off or pickup involved.
Warranty terms are where the routes really diverge. Apple and AASPs back genuine parts with 90 days of coverage or your remaining original warranty, whichever is longer. Reputable independent and on-site shops should offer a comparable written warranty on parts and labor. DIY carries none. Whatever route you choose, get the warranty length and what it covers in writing before the repair starts, not after something breaks.
What Can Go Wrong After A Back Glass Repair?
A back glass swap looks simple from the outside, but a few things commonly go sideways, especially on models with more integrated internals.
- Wireless charging failure, usually from a disconnected, pinched, or damaged charging coil during removal.
- Camera or flash issues, often from a jarred connector rather than the camera lens itself.
- Loss of water resistance, since the factory seal is difficult to fully replicate outside a controlled environment, even with correct adhesive.
- Failed part recognition, when Repair Assistant pairing gets skipped and the system won’t verify the new component.
Before you commit to any repair, run a quick value check. Compare the repair cost against your phone’s resale or trade-in value, factor in the device’s age and battery health, and be honest about whether the damage is purely cosmetic or actually functional (loose glass, exposed edges, sharp cracks near the camera). A three-year-old phone with a fading battery might not be worth a full glass replacement if a refurbished replacement device costs close to the same price.
Pro Tip: If you decide replacing the phone makes more financial sense than repairing it, don’t just toss the old one in a drawer. Wipe it properly and recycle or trade it through a certified program so the materials get responsibly processed instead of ending up in a landfill.
Why Choose On-Site Repair For Your iPhone’s Back Glass?
If you’d rather skip the shop entirely, Repair Genius brings the repair to you across Orlando and Winter Park, often with same-day availability. A technician arrives at your home or office, replaces the back glass on-site, and completes the same Repair Assistant pairing step a shop or Apple Store would, so the part registers correctly before they leave.
- Transparent, upfront pricing with no hidden diagnostic fees tacked on afterward.
- Parts and labor warranty backing the repair, spelled out before work begins.
- Data safety as a priority, since the technician works at your location under your supervision rather than taking the phone out of sight.
- Over 10 years of hands-on repair experience across iPhones, Android devices, laptops, and tablets.
On-site repair fits best when you can’t spare the time to sit in a waiting room, when you’d rather keep your phone in view during the repair, or when you simply want the convenience of scheduling around your day instead of a shop’s hours. It’s less ideal if you specifically need an Apple-branded repair for resale documentation, since Apple’s own service record carries certain paperwork advantages that a third-party repair, on-site or in-shop, doesn’t replicate.
What Actually Matters When Deciding On A Repair Route
Most advice on this topic treats DIY as either reckless or heroic, when the real answer is narrower than either extreme. The genuine risk isn’t the glass swap itself, it’s the paired components underneath it on newer models. iFixit’s own guides make that distinction clear, and it’s the detail most casual advice skips entirely.
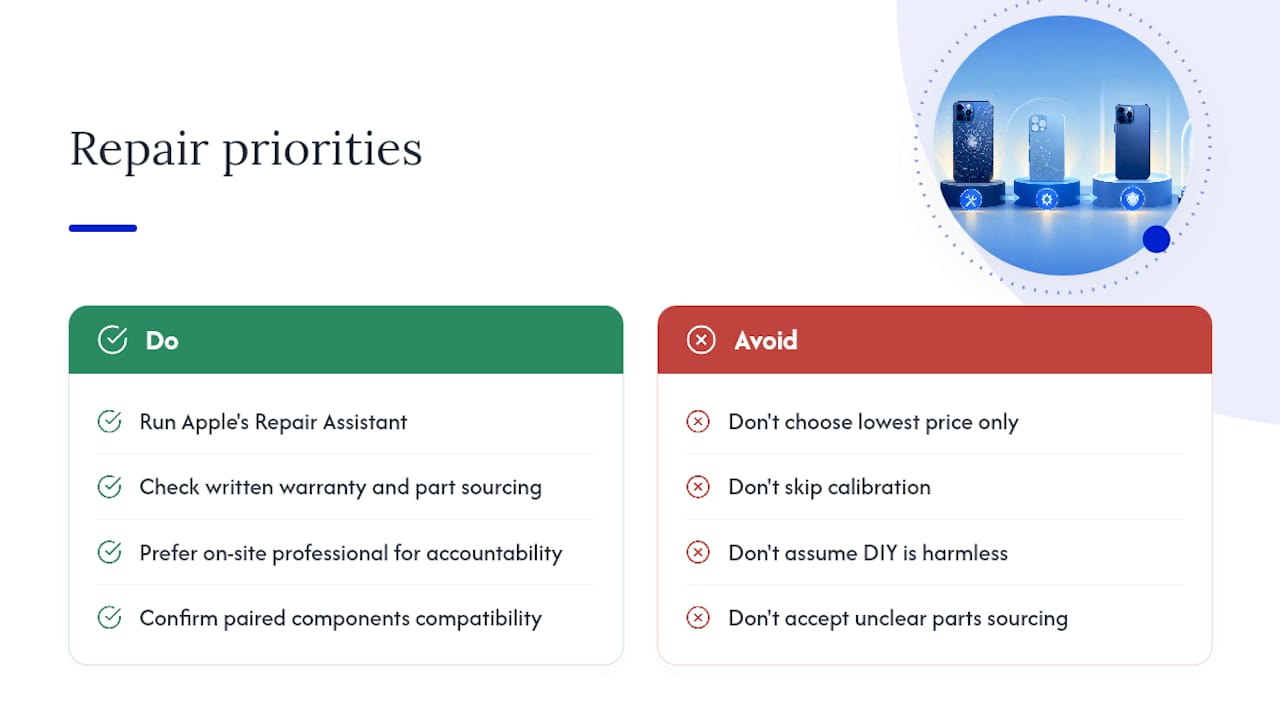
The bigger blind spot is calibration. People treat the physical repair as the finish line, when Apple’s own system won’t fully recognize a new part until you run Repair Assistant. Skip that step, professional or DIY, and you’ve done half a job.
My honest read: prioritize warranty terms and part sourcing over price alone. A cheap repair with no written warranty and unclear parts sourcing isn’t actually cheap if it fails in three months. If you value speed and directness without gambling on your own technique, an on-site professional route gives you shop-level accountability without the shop visit.
— Michael
Get Your iPhone Back Glass Fixed Without Leaving Home
Repair Genius is the alternative to sitting in a waiting room or mailing your phone off for a week: a certified technician comes to your home or office in Orlando or Winter Park and completes the back glass replacement on-site, often the same day you call.

You get the transparency you’d want from any good shop, an upfront quote with no hidden fees, genuine attention to parts warranty, and a technician who handles the Repair Assistant pairing step correctly before leaving your driveway. If you’re weighing Apple’s wait times against an independent shop’s unknowns, this is the option that skips both headaches while keeping your phone in view the entire time. Ready to get a quote? Book your on-site repair and get your iPhone back to full function today.
Recommended
- Cracked iPhone Screen Repair Near Me
- iPhone Screen Repair Cost and Same Day Repair in Orlando
- iPhone Screen Repair Process Explained for 2026
- Top 3 iPad Digitizer Repair Providers 2026