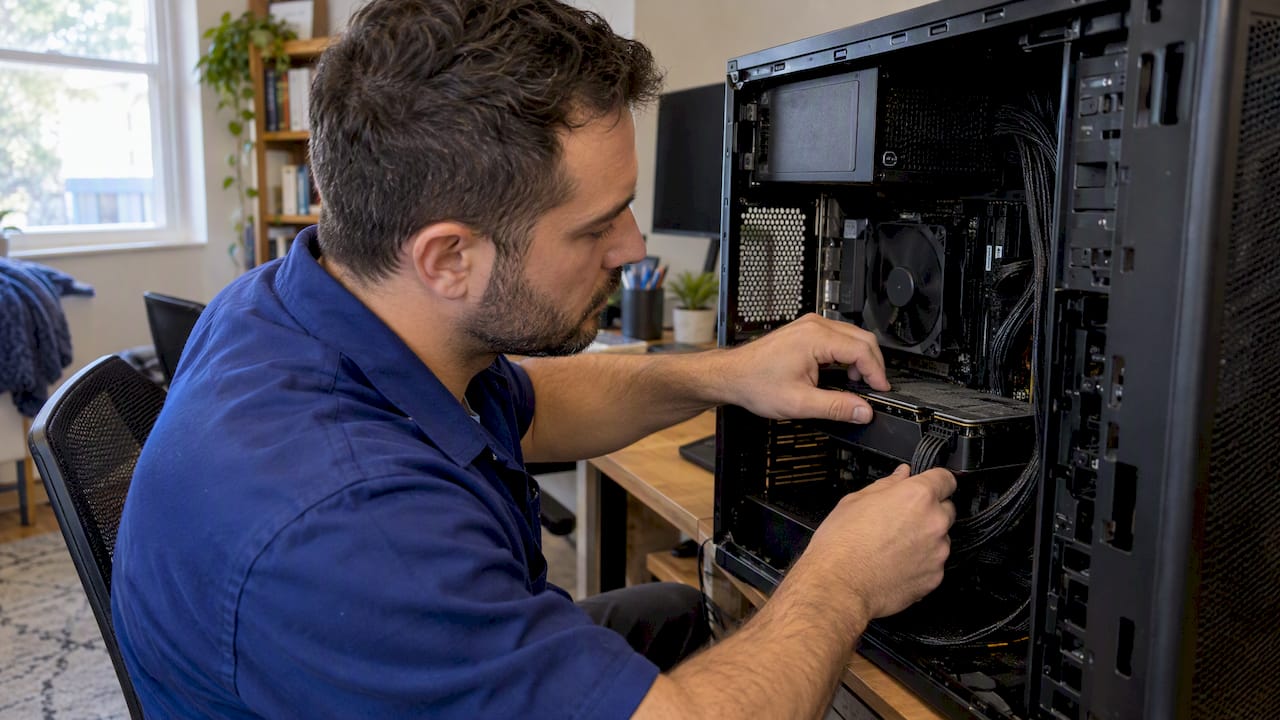
Yes, most desktop power supplies are replaceable by a careful DIYer with basic tools and about an hour of focused work. The first step is non-negotiable: shut down the PC, switch off the PSU, unplug the wall cable, then press and hold the case power button to discharge residual charge. From there, success comes down to matching form factor, wattage, and connectors, and using only the cables that ship with your new unit.
TL;DR:
- Size the unit so peak system draw uses roughly 50% to 60% of its rated wattage, with 100 to 150 watts of headroom.
- Check case clearance and connector counts before buying; newer, power hungry graphics cards call for ATX 3.1 and native 12V-2×6 support.
- Use only cables supplied with the replacement PSU; modular cable pinouts vary across brands and models, and mismatches can permanently short components.
- Call a technician for damaged wiring, smoke, or sparks; if the first boot fails, check that the 24 pin and EPS connections are seated.
Table of Contents
- Tools, workspace, and safety prep
- How to choose the right replacement PSU
- Remove the old PSU: step-by-step checklist
- Install the new PSU: mount, orient the fan, and pre-attach cables
- Reconnect cables and run your first-boot checklist
- Testing and basic troubleshooting after replacement
- Cable management and finishing touches
- Why DIY works, and when a technician makes more sense
- A simpler path: on-site computer repair from Repair Genius
- FAQ
- Sources
Tools, workspace, and safety prep
Before you touch a screw, set up a stable, non-carpeted surface with good lighting and enough room to lay out parts without losing track of them.
- A Phillips screwdriver, an anti-static wrist strap (or a habit of touching the case chassis to ground yourself), and a flashlight
- Zip ties for cable management and a small container or tray to hold screws
- Your phone, to photograph the current cable layout before you disconnect anything
Shut down the operating system, flip the PSU’s rear power switch to off, then unplug the AC cord. Press and hold the case power button for a few seconds to drain any charge left in the capacitors, then rest a hand on the bare metal chassis before handling internal components. Photograph each connector in place so you can match the new build later, and label any cable you are unsure about.
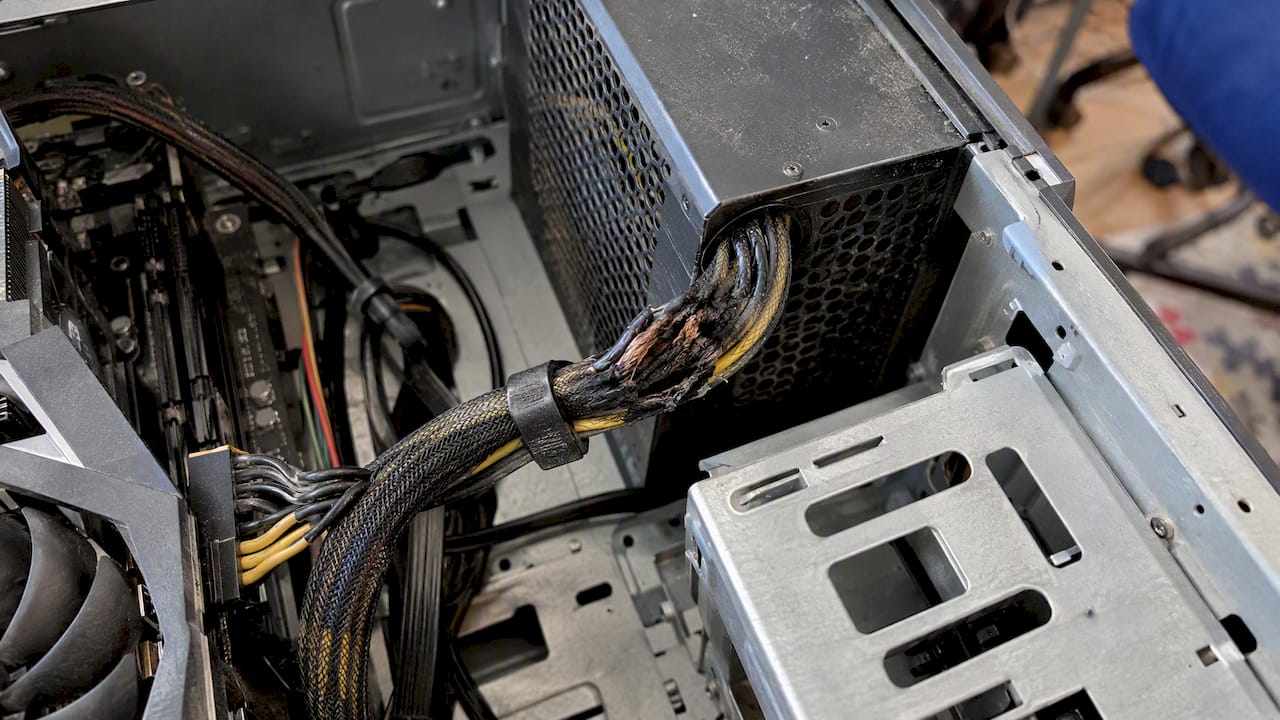
If you see scorch marks, melted plastic, or frayed wiring anywhere near the PSU, stop here and consider professional iMac power supply repair services to ensure safety and thorough assessment. That is a sign for a technician, not a weekend project.
Pro Tip: Lay screws out in the order you remove them, left to right, so reassembly takes no guesswork.
How to choose the right replacement PSU
Picking the correct unit matters more than the installation itself. Intel’s power supply guidance recommends sizing a PSU so your system’s peak load sits around 50 to 60% of its rated wattage, with roughly 100 to 150 watts of headroom for typical builds, which works out to multiplying your estimated peak draw by about 1.4.
Beyond wattage, a few checks keep you from buying the wrong part:
- Confirm form factor: ATX fits most towers, while SFX and SFX-L suit small form factor cases, so measure your case clearance first
- Count connectors: 24-pin ATX, CPU EPS (4+4 or 8-pin), PCIe 6+2, and confirm whether your GPU needs a native 12V-2×6 (12VHPWR) connector
- Check SATA and Molex counts against your drives and accessories
- Look for an 80 Plus Gold rating or higher as a sensible floor; Intel notes that higher efficiency reduces wasted energy and heat, which tends to mean cooler, longer-lasting operation
For newer, power-hungry graphics cards, Seasonic’s compliance notes point to ATX 3.1 as the better choice, since it handles the brief transient power spikes modern GPUs can produce and includes a native 12V-2×6 connector built for current-generation cards.
Whatever PSU you land on, never reuse modular cables from a different brand or model. Pinouts on the PSU side are not standardized across manufacturers, and a mismatched cable can short components permanently, according to step-by-step replacement guidance.
Remove the old PSU: step-by-step checklist
With the new unit chosen, removal is mostly patience and order.
- Confirm the system is powered off, unplugged, and discharged a second time before opening the case
- Photograph every existing connection, then disconnect cables one at a time, starting with peripheral power (SATA, Molex) before the 24-pin and EPS leads
- For stubborn clips, press the release tab fully before pulling, rather than tugging on the wire itself
- Remove the four rear-panel mounting screws, then slide the PSU out carefully, guiding cables through their routing holes as you go
- Bag the mounting screws and the old PSU’s cables together and set them aside
Small form factor and proprietary cases sometimes mount the PSU on a bracket or behind a shroud. Check your case’s manual if the unit does not slide free after the screws are out.
Pro Tip: Keep the old PSU’s cables with the old unit. Mixing cable sets between PSUs is exactly the mistake that causes shorts later.
Install the new PSU: mount, orient the fan, and pre-attach cables
If your new PSU is modular or semi-modular, attach the cables you plan to use outside the case first. It is far easier to seat connectors with the unit sitting on your desk than crammed inside a chassis.
- Mount the PSU in the bay with the fan facing down if your case has a bottom vent, or facing up if it does not
- Secure the four mounting screws snugly, without overtightening them into the thin sheet metal
- Connect the 24-pin ATX and CPU EPS cables first, since these feed the motherboard and processor
- Add GPU power (PCIe or 12V-2×6) next, then SATA and any remaining peripheral cables
- Route cables behind the motherboard tray where possible, using the case’s grommets
Only use the cables that shipped with this specific PSU. A cable that physically fits a different brand’s socket can still carry the wrong pinout.
Pro Tip: Pre-attach cables loosely before mounting, then tighten and route them once the PSU is screwed in. It saves you from fighting cables in a cramped case.
Reconnect cables and run your first-boot checklist
Work through the connections in a deliberate order: 24-pin ATX, then CPU EPS, then GPU power, then SATA and drive cables. Each connector should click or seat with light, even pressure. A cable that needs force is usually misaligned, not stubborn.
- Check that every clip has latched and no cable is pulled taut across a component
- If your PSU includes a Built-In Self-Test button, Dell’s BIST guidance explains that a solid LED paired with normal fan spin signals a pass, while no LED or no fan spin points to a faulty unit
- Plug the AC cord back in, flip the PSU switch on, then press the case power button while watching for POST, BIOS splash, or beep codes
- Leave the case open during this first boot so you can spot any smoke, sparks, or unusual smells immediately
If the system does not POST, recheck the 24-pin and EPS connectors before assuming the PSU itself is at fault. Loose seating here is the most common cause of a dead first boot.
Testing and basic troubleshooting after replacement
Run the PSU’s self-test if it has one, or use a dedicated PSU tester. A pass looks like steady LEDs and normal fan behavior, per Dell’s documented procedure; a fail means no LED activity or no fan spin at all.
- No power at all: check the wall outlet, the PSU’s rear switch, and the 24-pin or EPS seating before anything else
- GPU installed but no display: confirm the PCIe power cable is fully seated at both ends
- A confident user with a multimeter can check rail voltages against spec sheets, but this carries real shock risk if you are not comfortable with it
Stop and call a professional if you see smoke, sparks, or if the system still won’t POST after you’ve verified every connector twice.
Pro Tip: Rule out the simple stuff first: a different outlet and a reseated 24-pin cable solve more “dead PSU” cases than people expect.
Cable management and finishing touches
Fully modular PSUs cut clutter since you only install the cables your build actually needs, which also improves airflow around the fans, a point echoed in builder guidance on modular PSU benefits.
- Route cables through grommets and tie points, keeping bends gentle near the connector ends
- Keep cables clear of case fans and the CPU cooler’s airflow path
- Label and store any spare modular cables along with the PSU’s documentation for future upgrades
- Before closing the case, confirm all mounting screws are tight, no tools are left inside, and the fan orientation matches your case’s airflow design
Why DIY works, and when a technician makes more sense
I’ve walked plenty of first-time builders through this exact process, and the pattern holds: most PSU swaps go smoothly when someone follows the safety order and checks connectors twice. Where DIY attempts go sideways is usually a skipped discharge step or a mismatched modular cable.
If you see damaged wiring, you’re unsure about a connection, or a swap didn’t fix the problem, that’s when bringing in a technician protects both your time and your data.
— Michael
A simpler path: on-site computer repair from Repair Genius
If a PSU swap feels like more risk than you want to take on, or your system has other issues alongside a dying power supply, we bring the repair to you. Our on-site computer repair services cover hardware upgrades, PSU replacement, and troubleshooting, with same-day scheduling and transparent pricing quoted before we start.

Booking us makes the most sense when:
- Your system shows visible damage, burning smells, or wiring you’re not confident touching
- A DIY swap didn’t resolve the problem and you want it fixed without more trial and error
- You’d rather protect your data and your time than spend an afternoon troubleshooting
Reach out through our computer repair page to get a straightforward quote and a same-day appointment in Orlando or Winter Park.
FAQ
How to fix a power supply issue for a PC?
Start by checking the simple causes: a loose wall connection, the PSU’s rear power switch, and the 24-pin or EPS cable seating. If those check out, run a Built-In Self-Test if your PSU has one, since a solid LED and normal fan spin indicate a pass, while a failed test usually means replacement.
Is a 750 watt power supply overkill?
It depends on your components. Following Intel’s sizing guidance of keeping peak load near 50 to 60% of rated wattage, a unit rated around 750 watts suits a system with an estimated 550 to 650 watt peak draw, which fits many mid to high-end gaming builds rather than being excessive.
What are the four types of power supply?
Desktop PSU form factors commonly referenced are ATX, SFX, SFX-L, and TFX, each sized for different case types from full towers to small form factor builds. Confirming your case’s supported form factor before buying avoids a unit that won’t physically fit.
How to set a power supply?
After mounting the PSU with the fan oriented toward open airflow, connect the 24-pin ATX and CPU EPS cables first, then GPU power and SATA cables. Flip the PSU’s rear switch on, plug in the AC cord, and press the case power button while watching for a normal POST sequence.
Sources
For deeper detail on sizing, BIST testing, and ATX 3.1 connectors, see the sources linked throughout this guide below.
- How to Choose Power Supply for PC: What to Know – Intel
- How to Run a Power Supply Unit Self-Test On a Dell Desktop or All-in-One Computer | Dell
- Seasonic — PSU compliance with ATX and PCIe standards